Shopify (Pro Only)
Integrate Live Shopping with your Shopify store
In order to integrate the LORA LiveShopping player into a Shopify store, you will need to add some code to your Shopify LiveShopping landing page (wherever you want to embed the player). The embed and integration codes can be added by adding script tags to your page content or theme codes.
Below you'll find a sample Shopify integration code that you can use when integrating LORA One-to-many player into your Shopify store.
Steps:
- Embed show(s) into a page 🔗
- Add Shopify products to LORA Player
Add the sample integration code to your page 🔗
- (Optional) Modify the integration code using Player API Reference.
Add Conversion Tracking 🔗 [Coming soon]
Getting started
Embedding a show
The simplest way to embed a One-to-many show on a Shopify store page is to copy-paste the embed code to your page content. In the LORA dashboard, on each show setup page, you will find a code snippet that contains the embed code for that show. You can simply copy-paste it to any page (as HTML).
If you are doing Cart Integration with Shopify, you can skip this step and head to the Cart Integration section
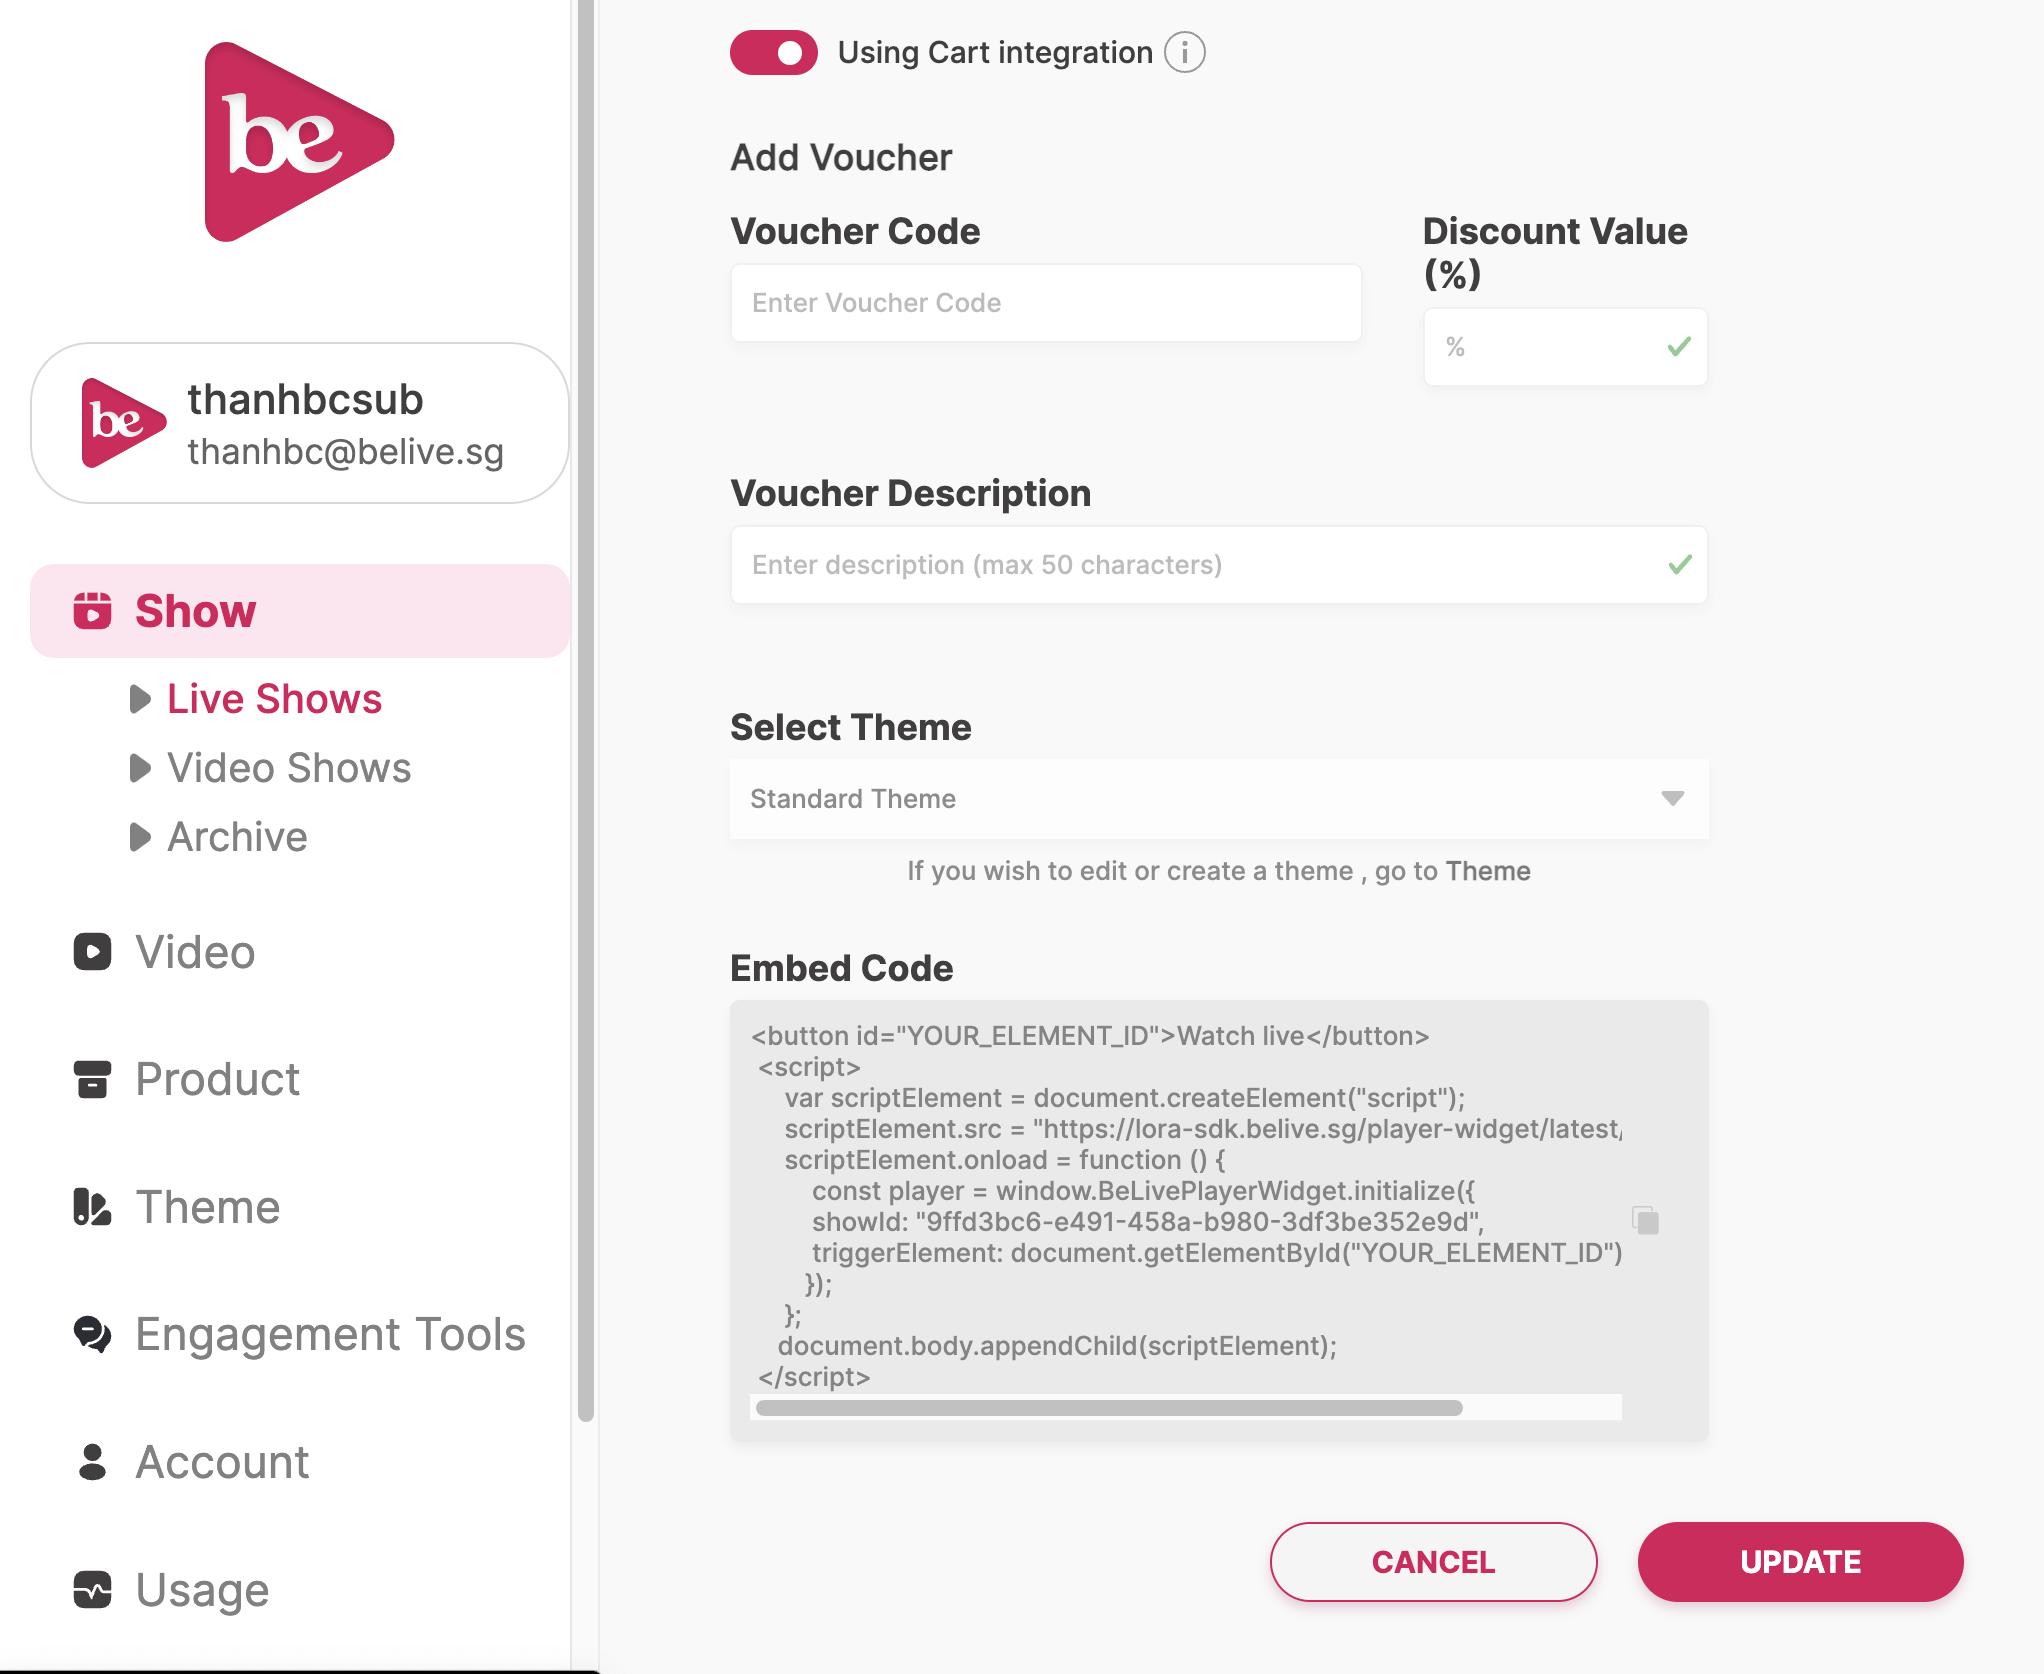
Copy the Embed Code from the show setup page on the LORA dashboard.
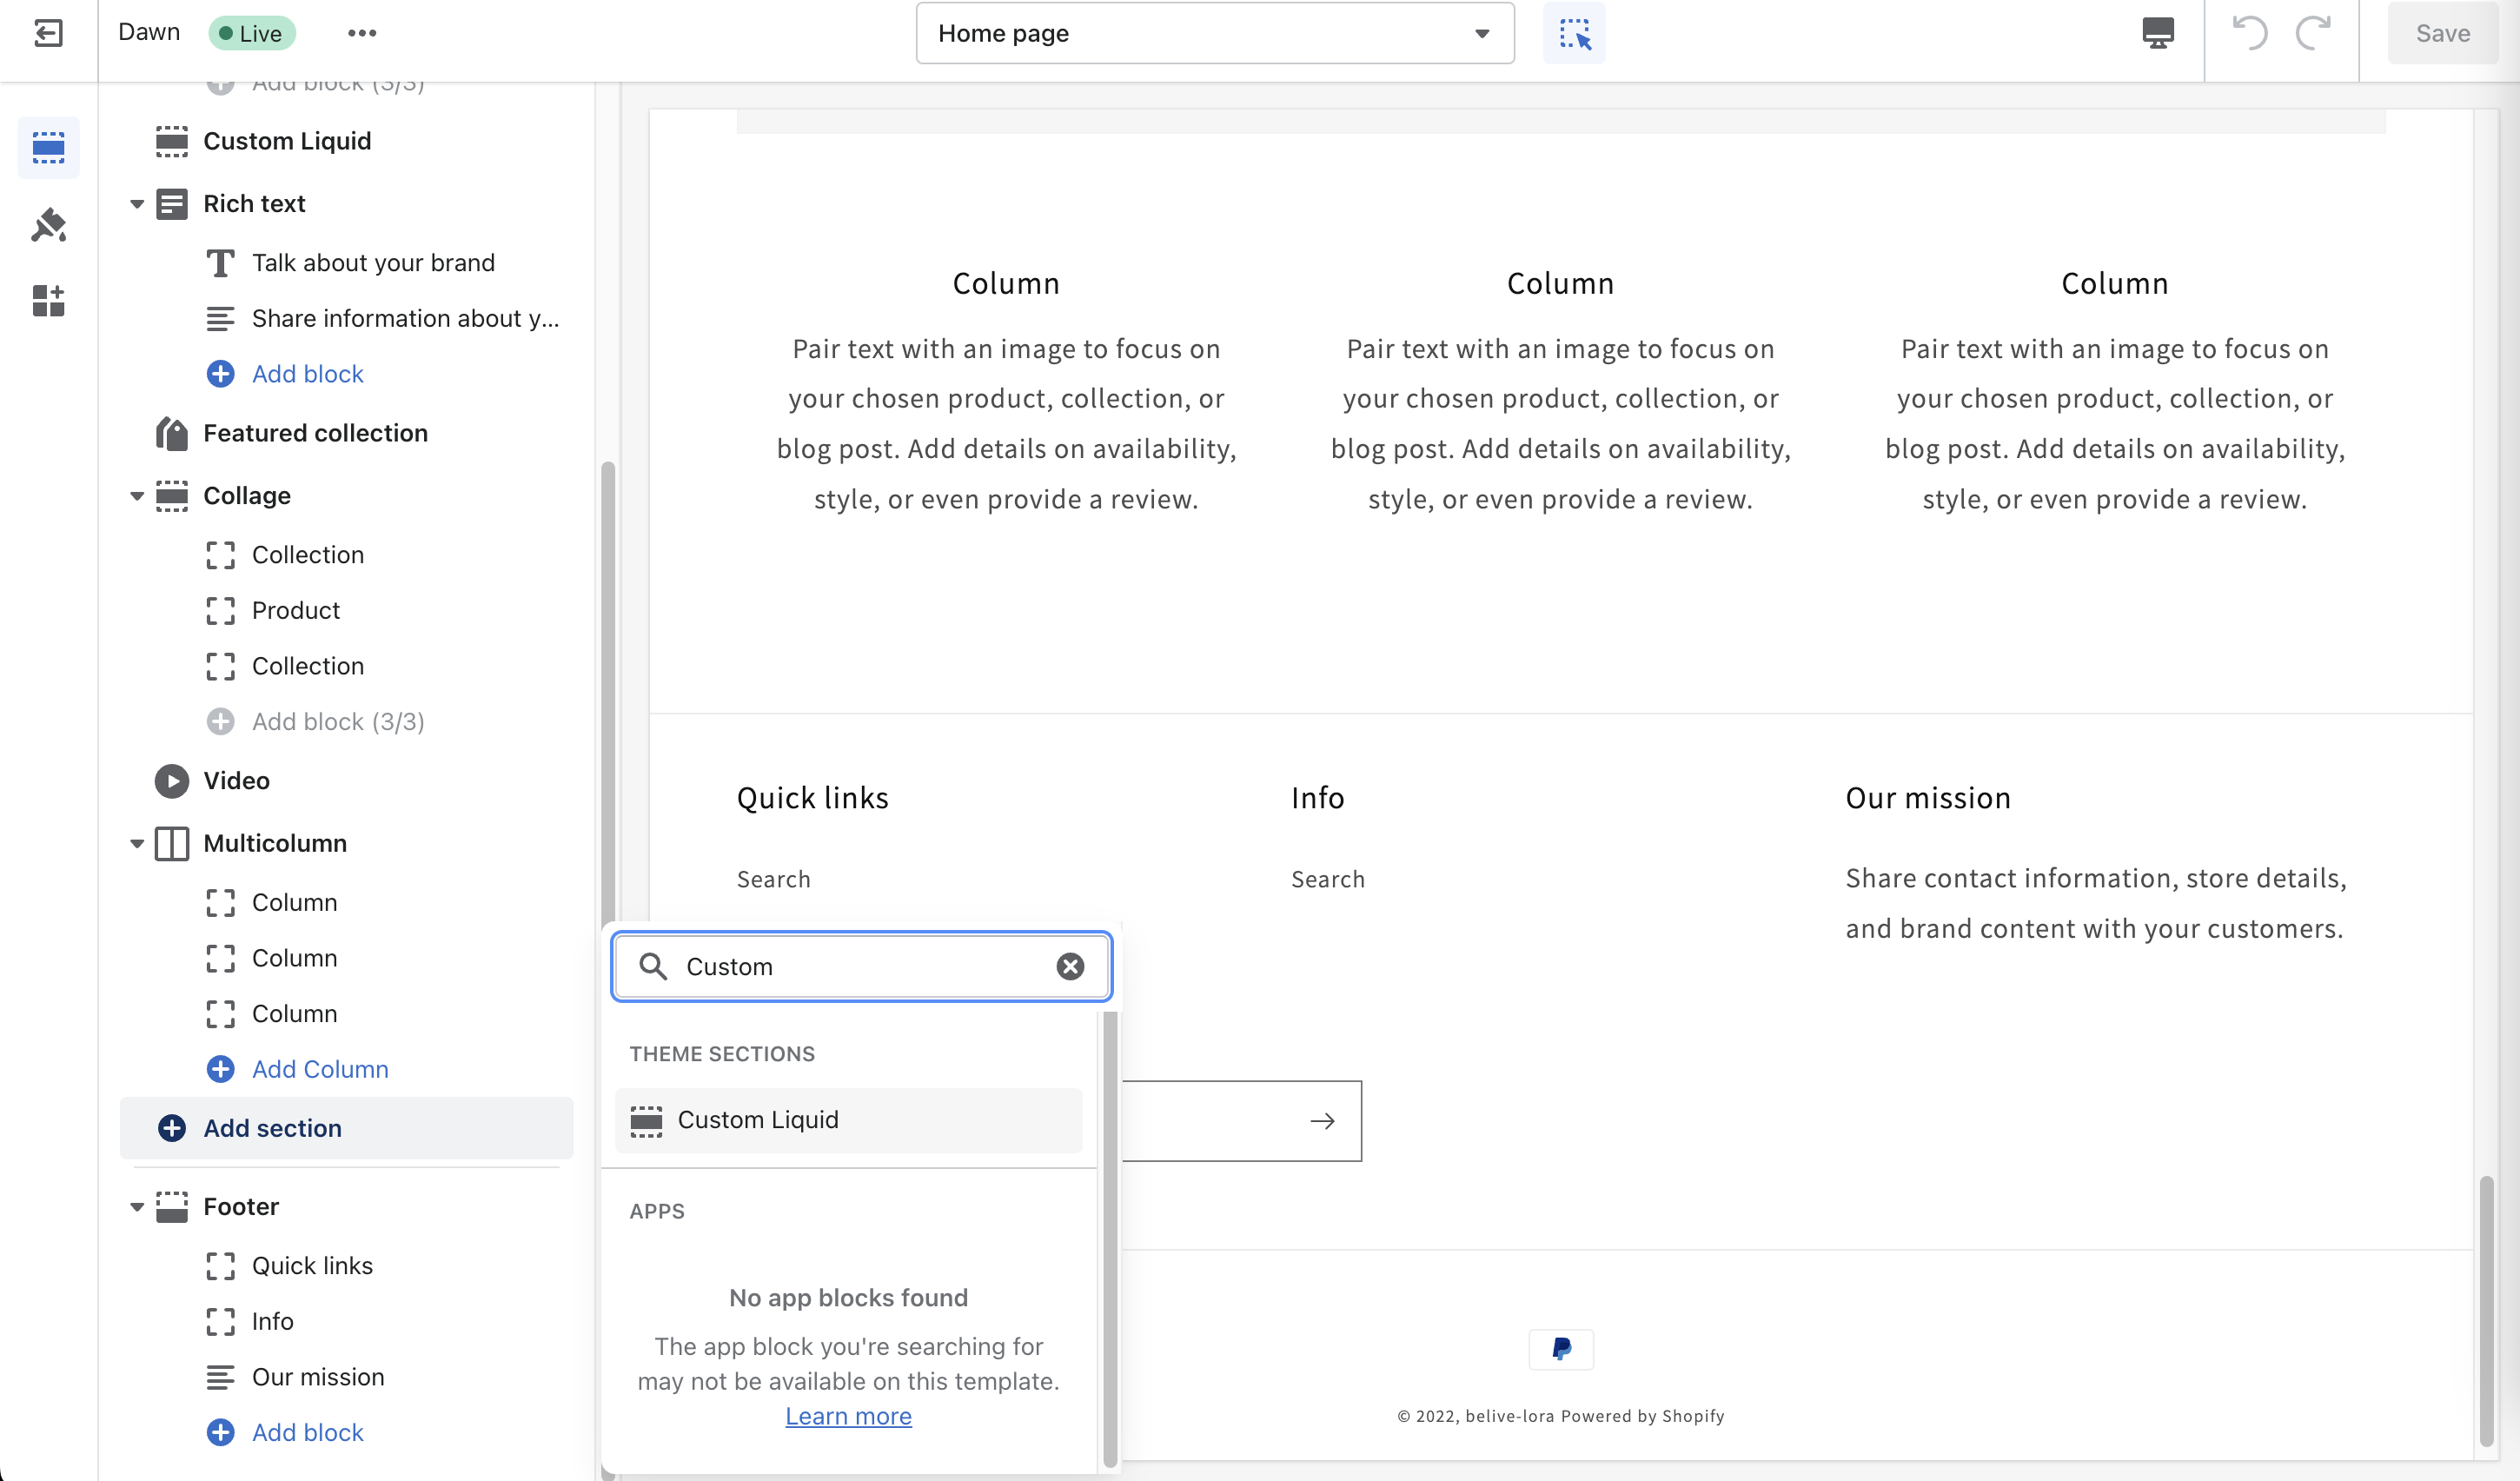
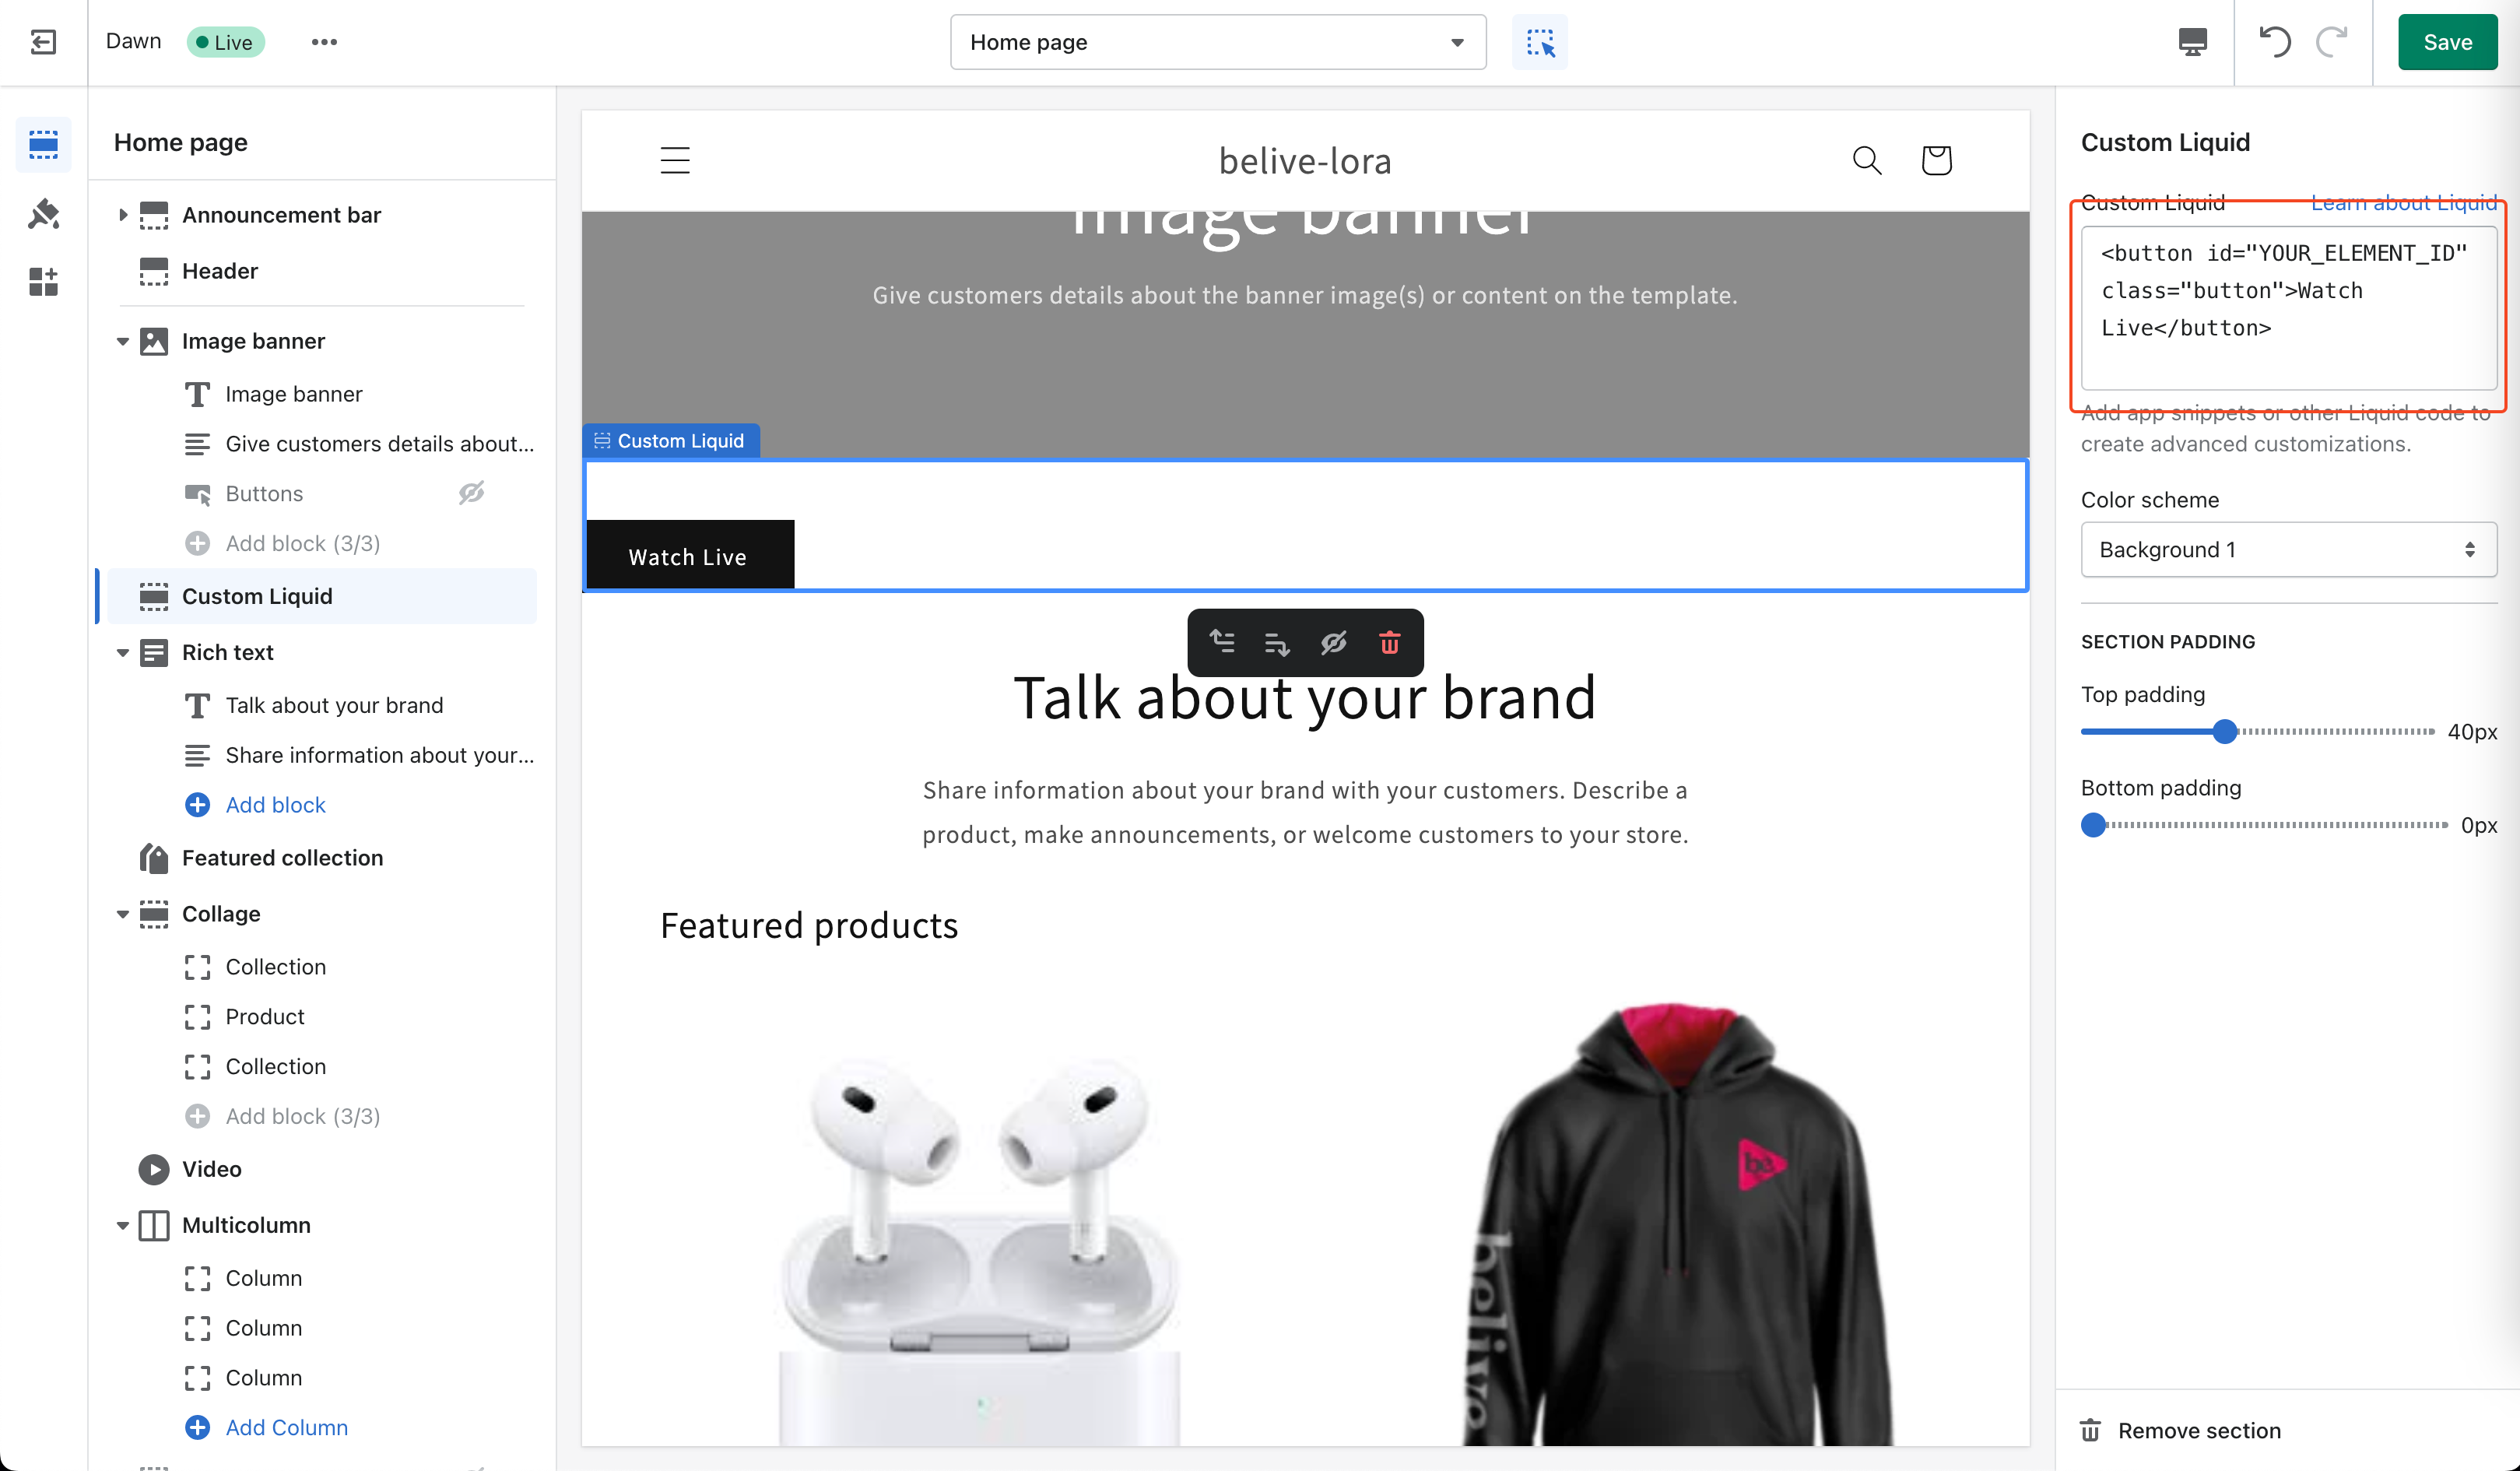
On your Shopify page, switch to the theme editor and add a section called Custom Liquid
Paste the embed code to the Custom Liquid section on the left side.

Embedding multiple shows on one page
If you want to embed multiple shows on one page you can call BeLivePlayerWidget.initialize method multiple times to register more than one show.
window.BeLivePlayerWidget.initialize({
   showId: "YOUR_SHOW_ID",
   triggerElement: document.getElementById("YOUR_ELEMENT_ID"),
   buttons: {
      dismiss: window.BeLivePlayerWidget.Button.CLOSE,
      checkout: window.BeLivePlayerWidget.Button.LINK,
   },
});
In the example below you see how to have more than one show embedded into your landing page.
Example code
<button id="YOUR_ELEMENT_ID">Watch live</button>
<button id="YOUR_ELEMENT_ID_2">Watch live 2</button>
<script>
 var scriptElement = document.createElement("script");
 scriptElement.src = "https://lora-sdk.belive.sg/player-widget/latest/player.min.js";
 scriptElement.onload = function () {
    // Multiple shows can be embedded in a single page as below
    // The trigger element for opening the specified show
    window.BeLivePlayerWidget.initialize({
       showId: "SHOW_ID",
       triggerElement: document.getElementById("YOUR_ELEMENT_ID"),
       buttons: {
       dismiss: window.BeLivePlayerWidget.Button.CLOSE,
       checkout: window.BeLivePlayerWidget.Button.LINK,
    },
    });
    window.BeLivePlayerWidget.initialize({
       showId: "SHOW_ID_2",
       triggerElement: document.getElementById("YOUR_ELEMENT_ID_2"),
       buttons: {
       dismiss: window.BeLivePlayerWidget.Button.CLOSE,
       checkout: window.BeLivePlayerWidget.Button.LINK,
    },
    });
 };
 document.body.appendChild(scriptElement);
</script>
Cart Integration
To add product and cart functionalities to the player, you need to implement Cart Integration into your Shopify store.
Add Shopify products to LORA Player
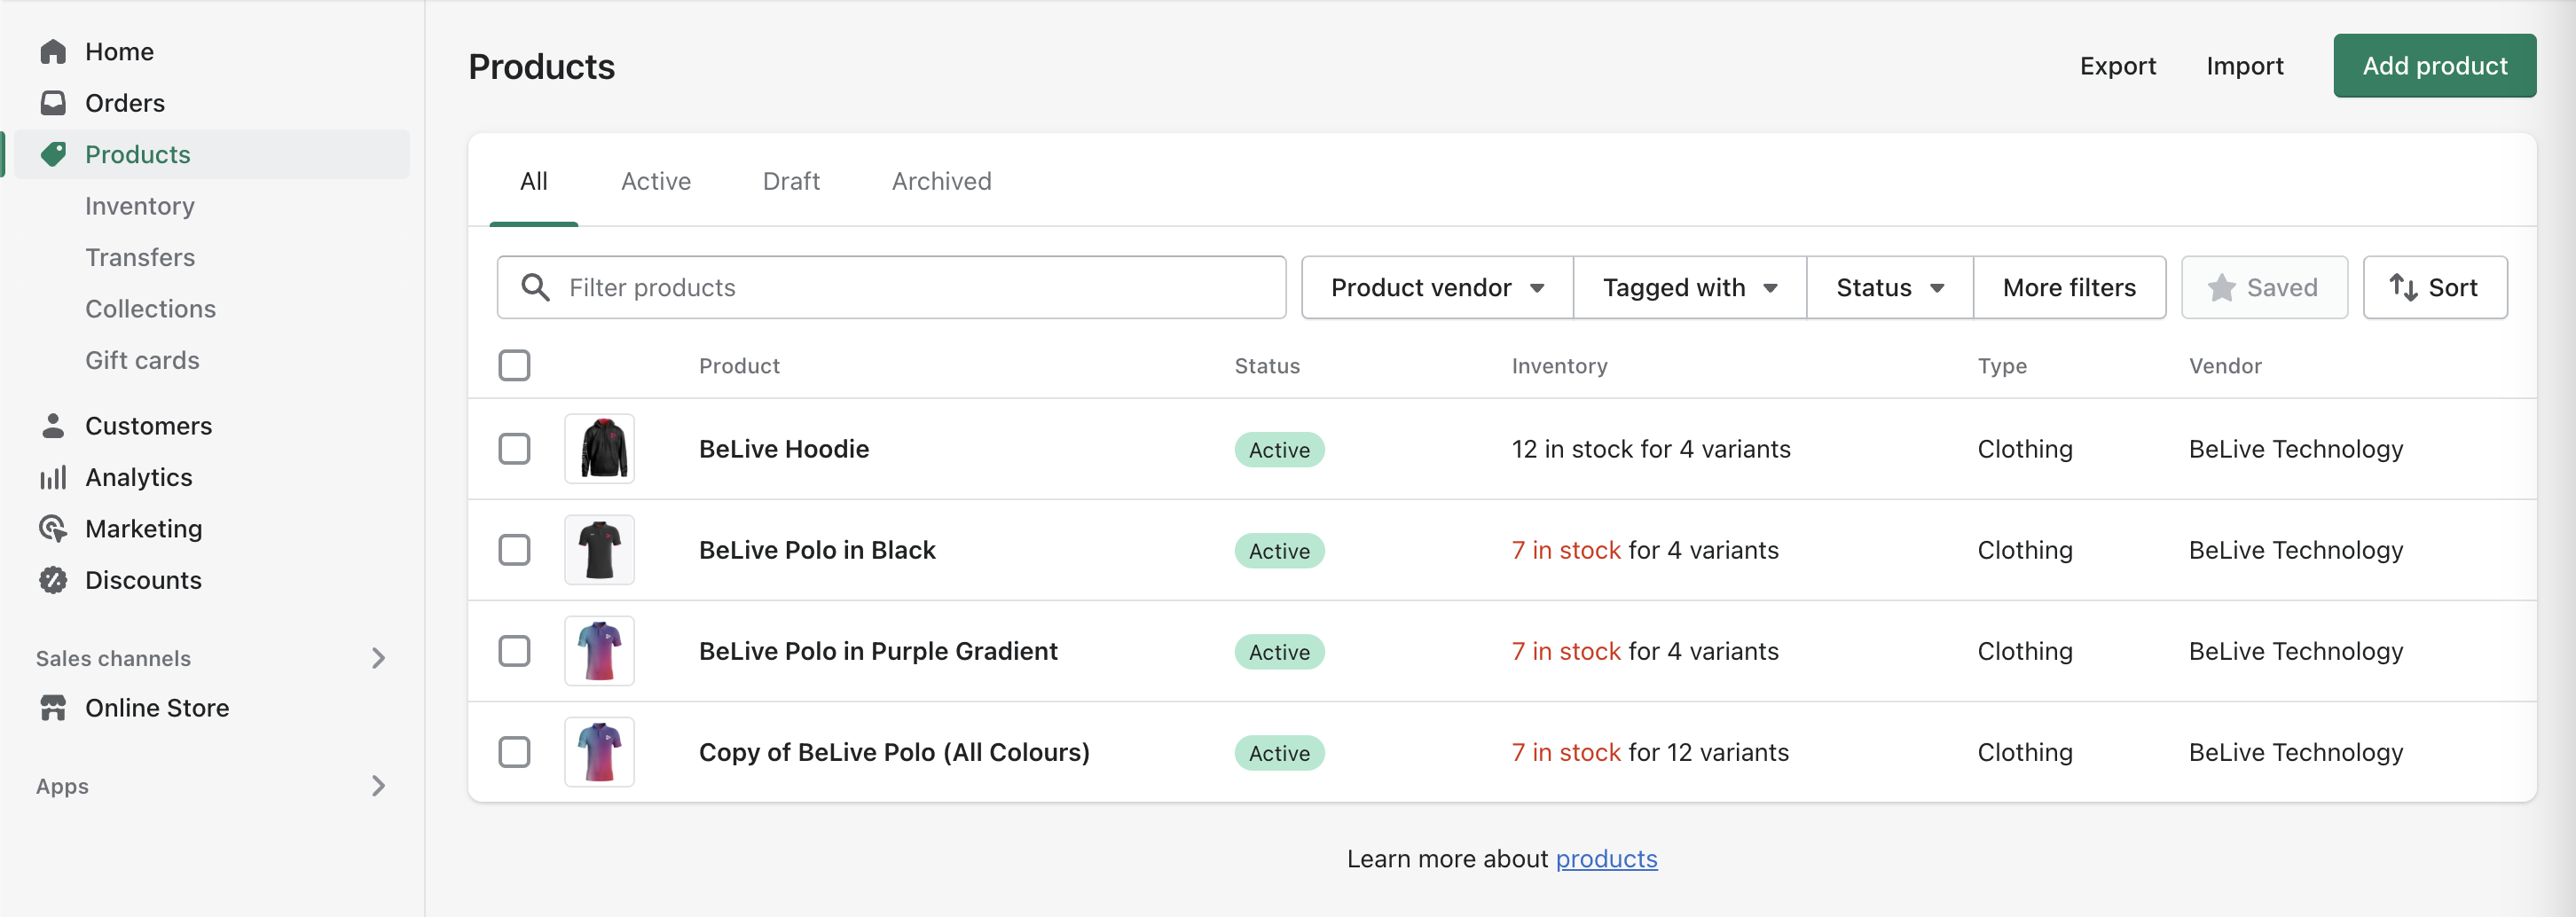
On Shopify Admin page, navigate to the Products section. Click on any product name to start
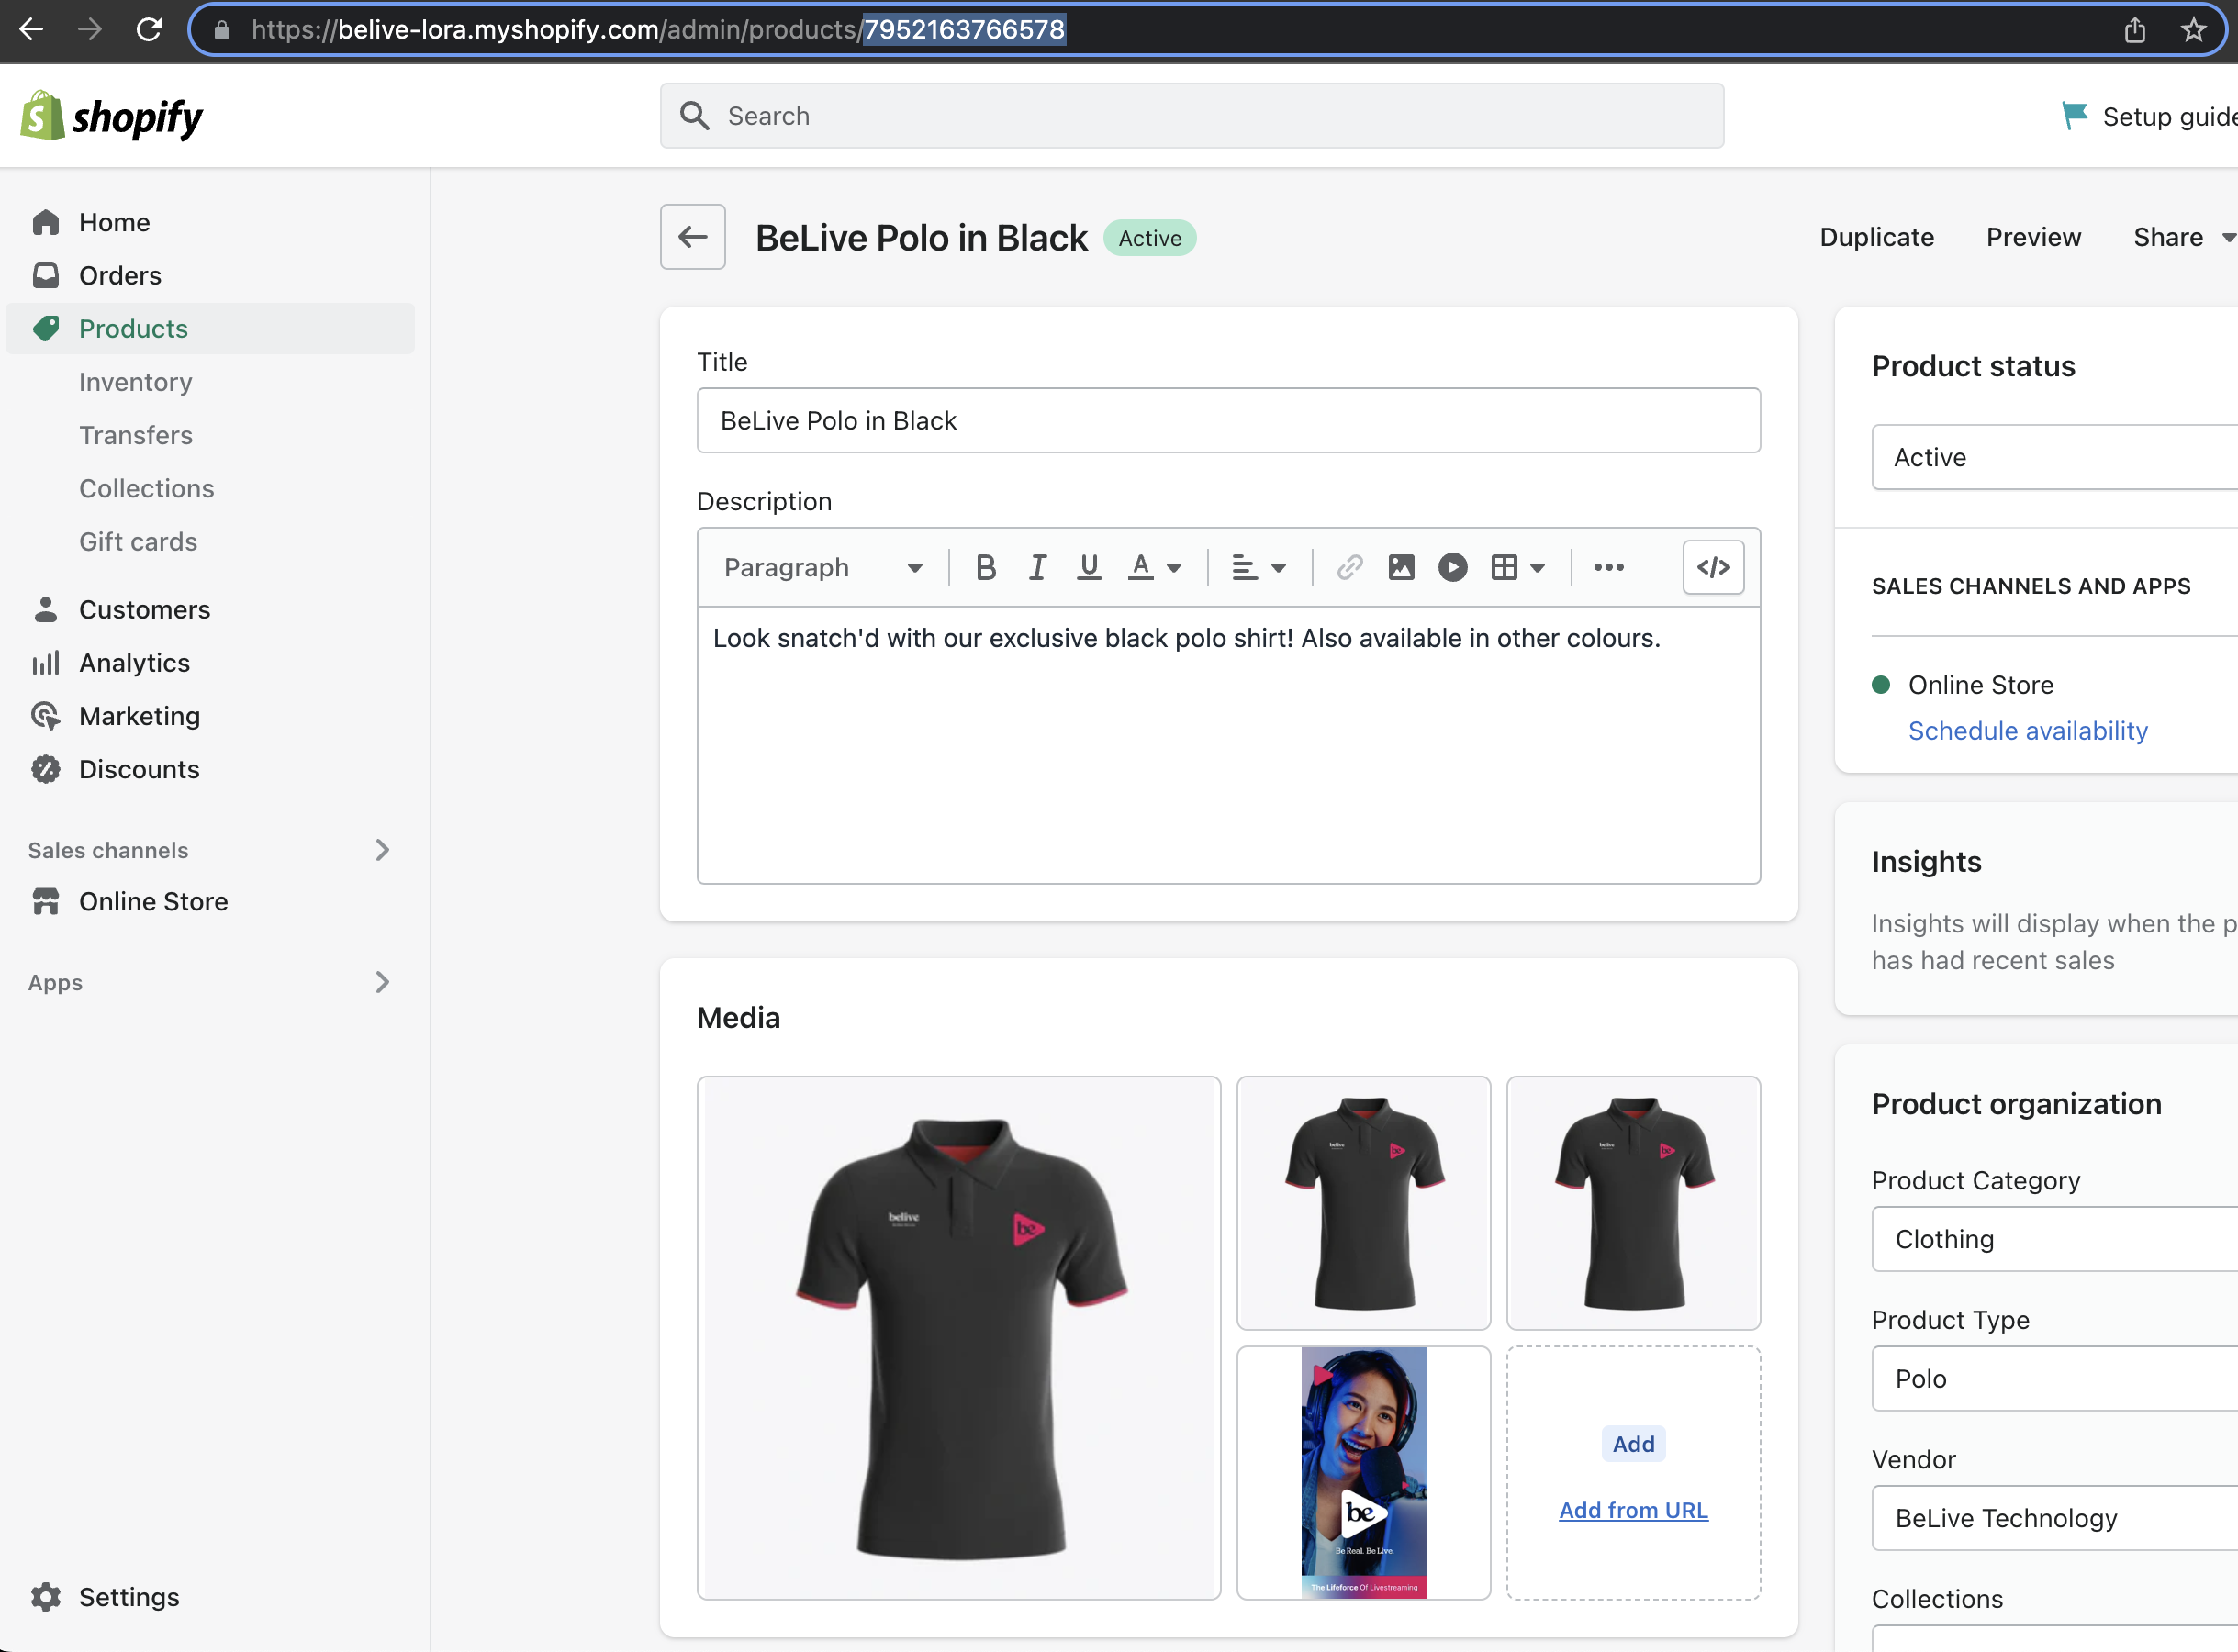
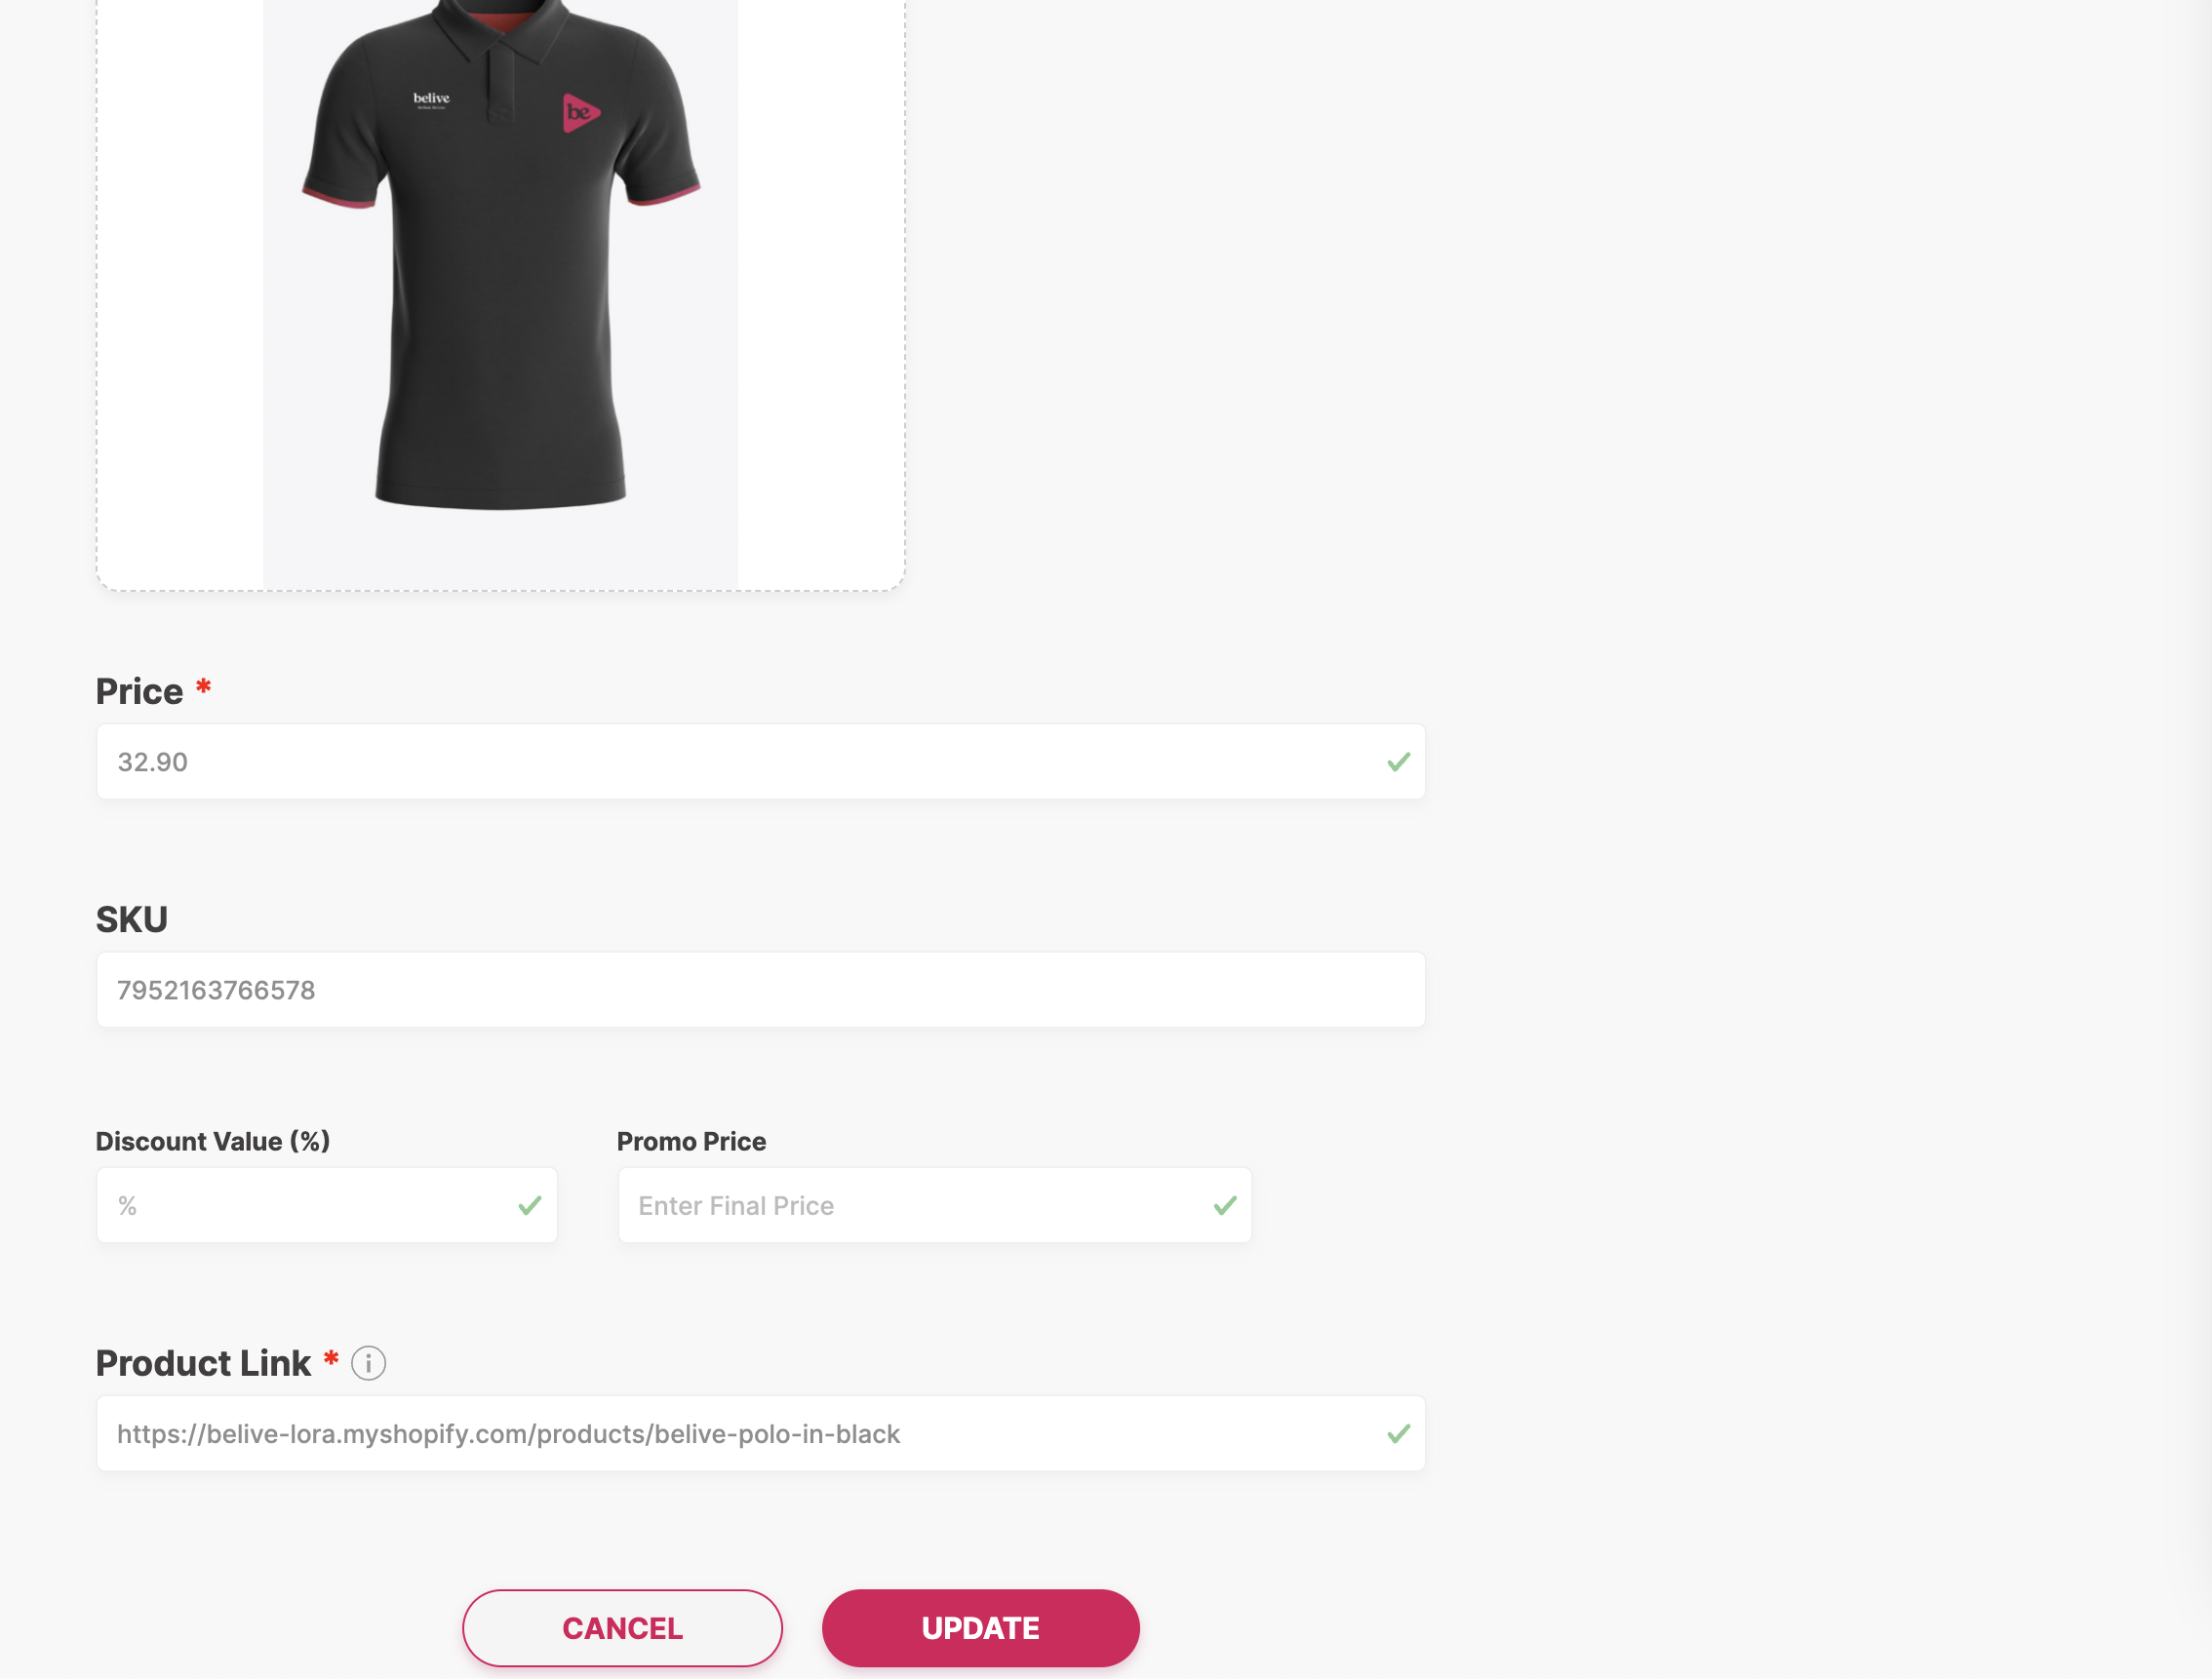
Copy the product ID on browser's address bar
Copy the product url from Search engine listing section at the end of the page

On LORA Dashboard, navigate to Product section from left navigation bar. Click Create Product
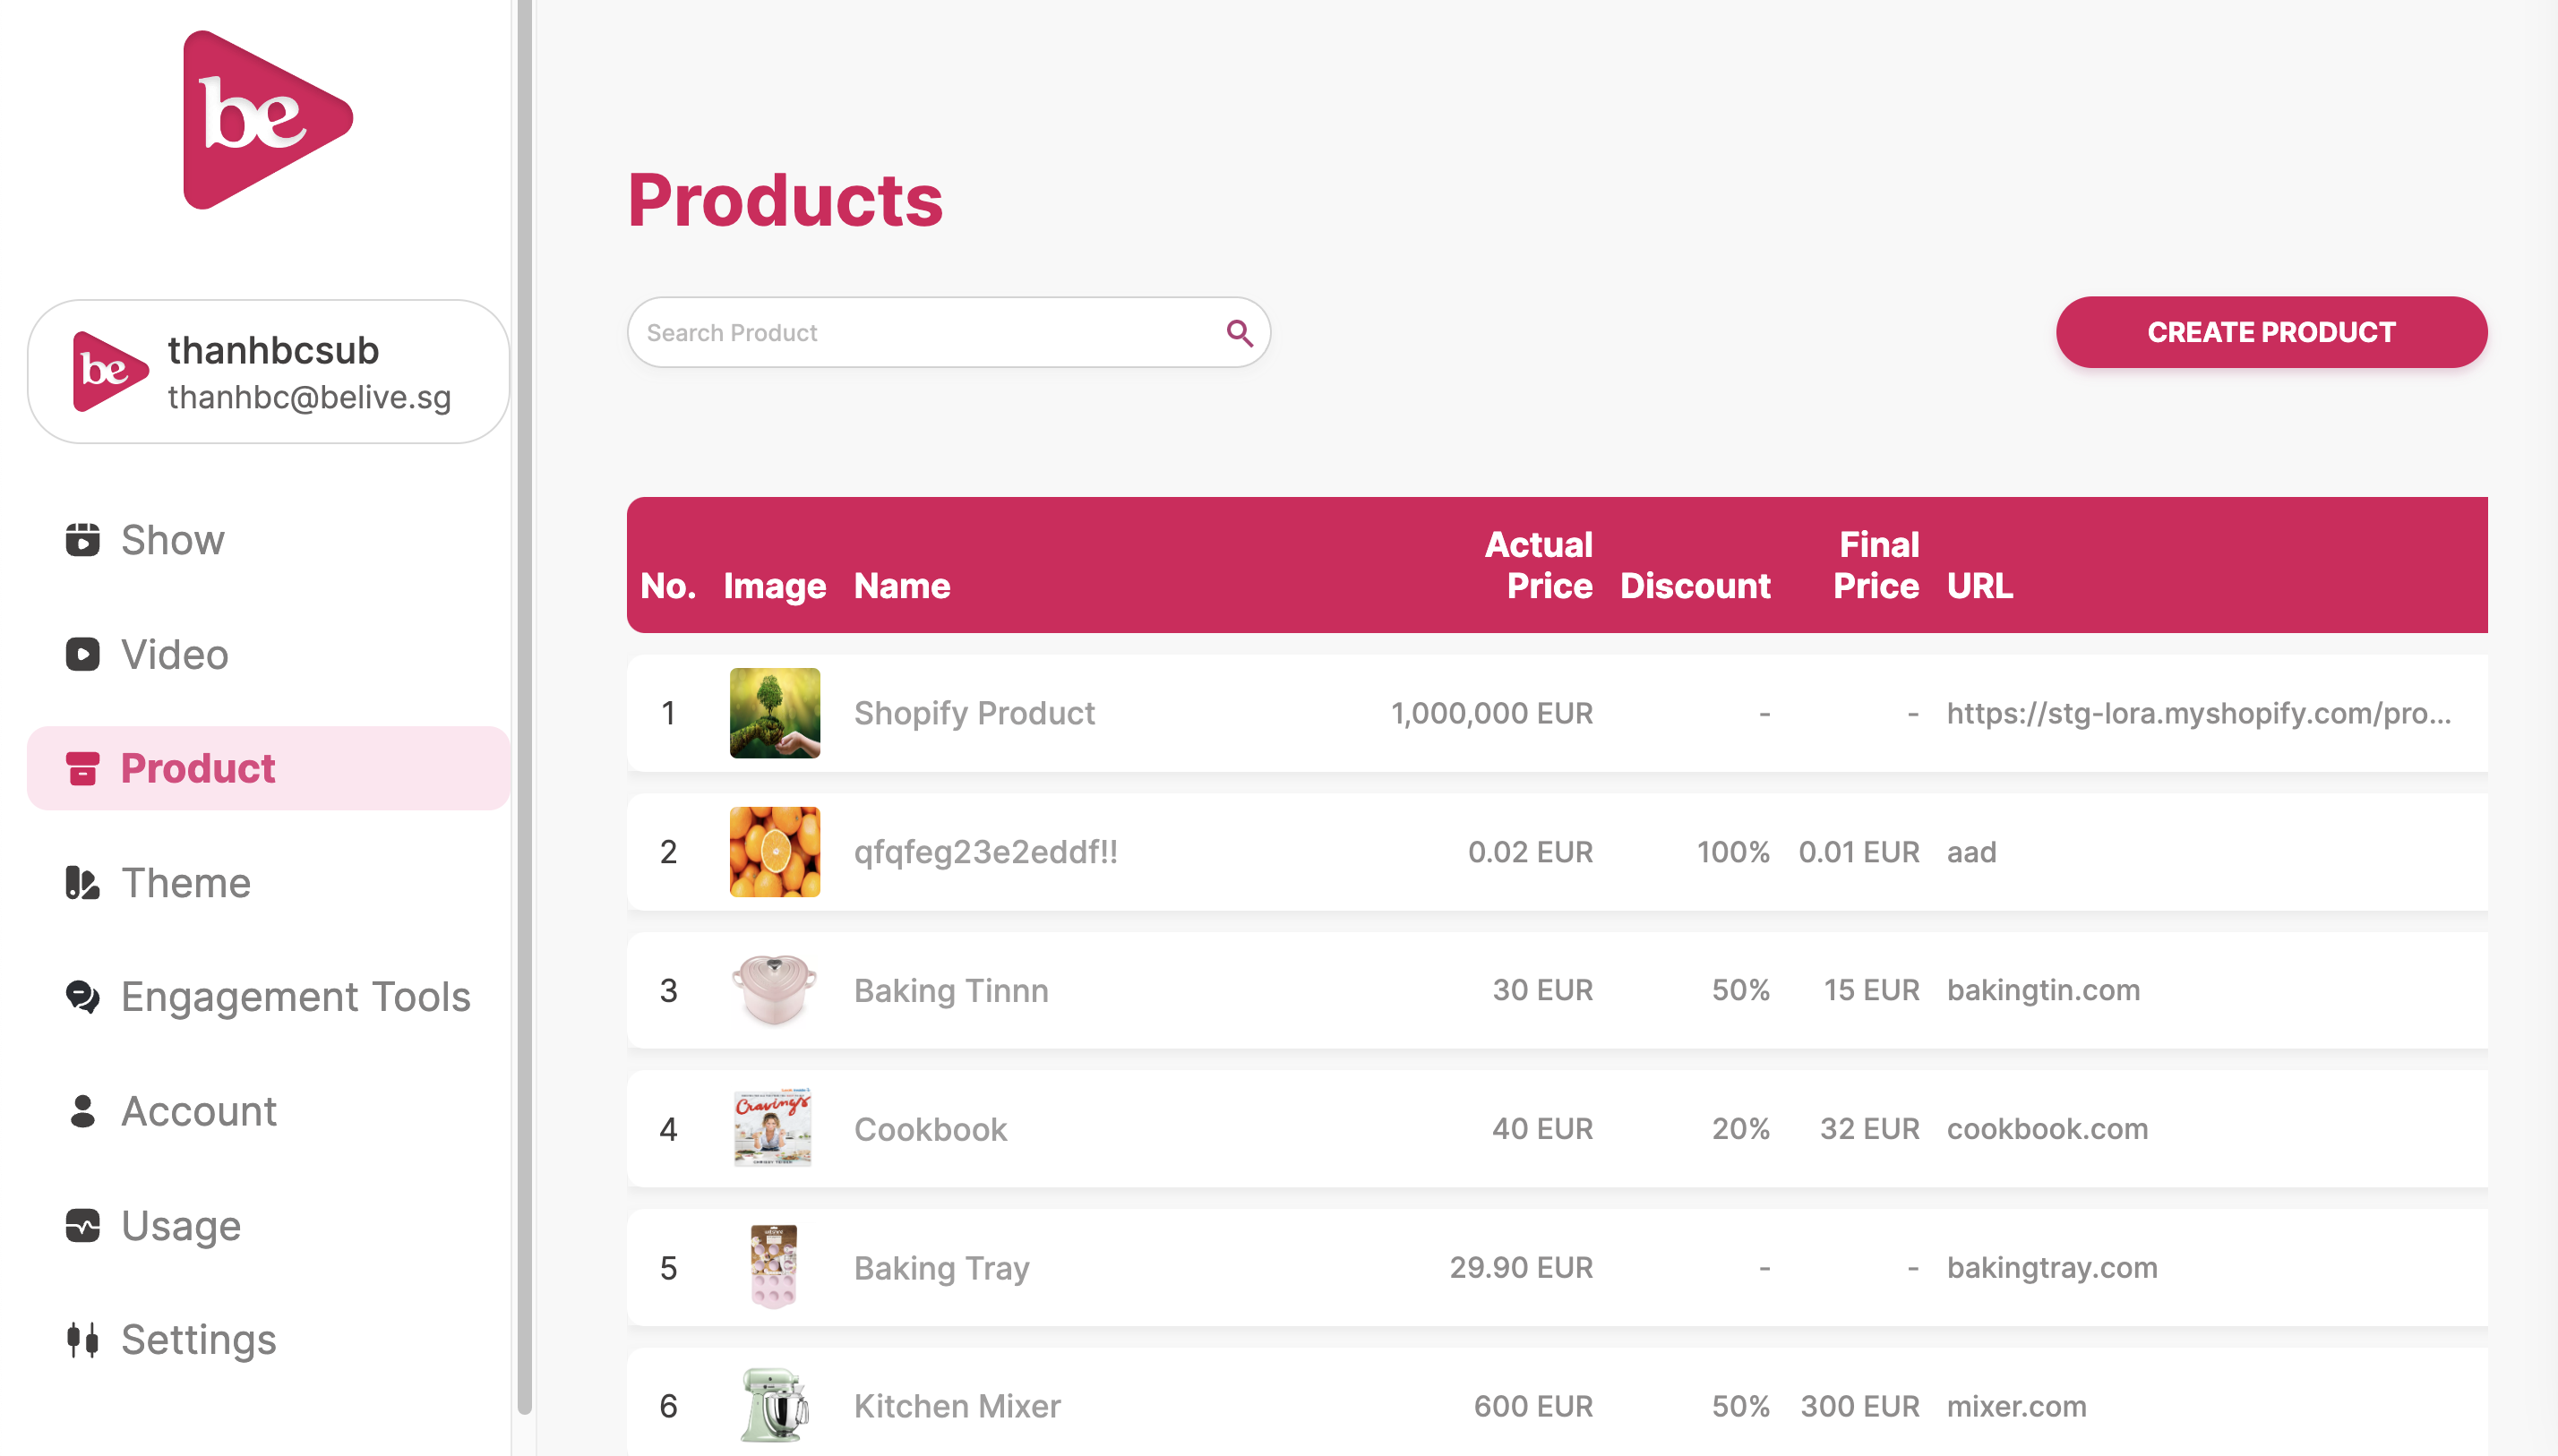
Create a product with the SKU and Product Link that are copied from above
Go to the Show Details page and add products to the show
NoteRemember to switch on the Using Cart integration to make the cart integration code work

Sample integration code
Here you find a sample integration code that implements the Cart Integration feature into your Shopify store. This sample code works on almost all Shopify stores that have standard product models without any changes required. However, if you have a special product setup, you may need to modify the code to justify that with your case.
In the next section, we explain how you should add the integration code into your Shopify store.
Sample code: With "Watch Now" button
Please remember to replace const SHOW_ID = "YOUR_SHOW_ID" with your show ID
<button id="YOUR_ELEMENT_ID">Watch Live</button>
<script>
   (function () {
      const ELEMENT_ID = "YOUR_ELEMENT_ID";
      const SHOW_ID = "YOUR_SHOW_ID";
      // Reduces server calls if a product has a crazy number of images.
      const MAX_IMAGES_COUNT = 6;
      // Extracts product handle from the product URL
      const SHOPIFY_PRODUCT_URL_HANDLE_REGEX = /\/products\/(.[\w\d-+]+)/;

      // Sometimes image URLs miss the protocol at the beginning
      // E.g. '//cdn.shopify.com/s/files/.../image.jpg'
      const urlSanitizer = (url) => {
         if (typeof url === "string") {
            if (url.startsWith("//")) return `https:${url}`;
            else if (url.toLocaleLowerCase().startsWith("http")) return url;
            else console.log(`Not a valid URL: ${url}`);
         } else console.log(`Not a valid URL: ${url}`);
         return null;
      };

      //========== Shopify Ajax API Helper methods ===============

      const storeApi = {};

      storeApi.getProductByUrl = (url) => {
         const handle = SHOPIFY_PRODUCT_URL_HANDLE_REGEX.exec(url);
         if (typeof handle[1] !== "string" && handle[1].length > 0) {
            console.error("The provided URL is hhgfhghs");
            return;
         }
         return fetch("/products/" + handle[1] + ".js", {
            method: "GET",
            headers: {
               "Content-Type": "application/json",
            },
         }).then((resp) => resp.json());
      };

      storeApi.addToCart = (itemId) =>
         fetch("/cart/add.js", {
            method: "POST",
            headers: {
               "Content-Type": "application/json",
            },
            body: JSON.stringify({
               items: [
                  {
                     quantity: 1,
                     id: itemId,
                  },
               ],
            }),
         }).then((resp) => resp.json());

      storeApi.updateItemInCart = (itemId, quantity) =>
         fetch("/cart/update.js", {
            method: "POST",
            headers: {
               "Content-Type": "application/json",
            },
            body: JSON.stringify({
               updates: {
                  [itemId]: quantity,
               },
            }),
         }).then((resp) => resp.json());

      storeApi.getCartState = () =>
         fetch("/cart.js", {
            method: "GET",
            headers: {
               "Content-Type": "application/json",
            },
         }).then((resp) => resp.json());

      const scriptElement = document.createElement("script");
      scriptElement.src = "https://lora-sdk.belive.sg/player-widget/latest/player.min.js";
      scriptElement.onload = function () {
         const player = window.BeLivePlayerWidget.initialize({
            showId: SHOW_ID,
            triggerElement: document.getElementById(ELEMENT_ID),
            buttons: {
               dismiss: window.BeLivePlayerWidget.Button.CLOSE,
               checkout: window.BeLivePlayerWidget.Button.LINK,
            },
         });
         const EVENT = window.BeLivePlayerWidget.PlayerEventType;

         player.on(EVENT.ADD_TO_CART, (addedItem, callback) => {
            storeApi
               .addToCart(addedItem.sku)
               .then((res) => {
                  if (res.items) {
                     callback(true);
                     console.log("Item added succussfully!");
                  } else if (res.description && res.description.includes("sold out")) {
                     callback({ success: false, reason: "out-of-stock" });
                  } else callback(false);
               })
               .catch((error) => {
                  callback(false);
                  console.error("Add to cart error! ", error);
               });
         });

         player.on(EVENT.UPDATE_ITEM_IN_CART, (updatedItem, callback) => {
            console.log(`Cart updated! ${updatedItem.previousQuantity} --> ${updatedItem.quantity}`);
            storeApi
               .updateItemInCart(updatedItem.sku, updatedItem.quantity)
               .then((res) => {
                  if (res.items) {
                     callback(true);
                     console.log("Item updated succussfully!");
                  } else callback(false);
               })
               .catch((error) => {
                  callback(false);
                  console.error("Error on updating item! ", error);
               });
         });

         player.on(EVENT.SYNC_CART_STATE, () => {
            // Use your method to check if the user has checkout
            storeApi.getCartState().then((res) => {
               if (res.item_count == 0) {
                  // Emptying the in-player cart
                  player.updateCart([]);
               } else {
                  player.updateCart(
                     res.items.map((item) => ({
                        sku: item.id,
                        quantity: item.quantity,
                        imageUrl: item.image,
                        name: item.product_title,
                        description: item.product_description,
                        currentPrice: item.discounted_price / 100,
                        colorName: item.variant_title,
                     })),
                  );
               }
            });
         });

         player.on(EVENT.CHECKOUT, () => {
            // Use the showCheckout() method to safely
            // navigate the user to your checkout page
            player.showCheckout(window.location.origin + "/cart");
         });
         // ---- End of Cart Integrations ----

         // ---- Start of Product Hydration ----
         player.on(EVENT.SYNC_PRODUCT_DATA, (products) => {
            // Iterates over all the products you have added to the show on the dashboard
            products.forEach(({ ref: sku, id, url }) => {
               // Your method to fetch a product data
               storeApi.getProductByUrl(url).then((item) => {
                  player.updateProduct(id, {
                     name: item.title,
                     brand: item.vendor,
                     description: item.description,
                     sku: item.id,
                     defaultVariantIndex: 0,
                     colors: item.variants.map((variation) => ({
                        colorName: variation.title,
                        sku: item.id,
                        images: [
                           // Adding the featured image of the chosen variation (if existed) at the beginning of the images array
                           ...(variation.featured_image ? [variation.featured_image.src] : []),
                           // Adding product imgaes
                           ...item.images
                              .slice(0, MAX_IMAGES_COUNT - 1)
                              .map((url) => urlSanitizer(url))
                              .filter((url) => typeof url === "string"),
                        ],
                        sizes: [
                           {
                              name: variation.title,
                              sku: variation.id,
                              currentPrice: variation.price / 100,
                              originalPrice: variation.compare_at_price / 100,
                           },
                        ],
                     })),
                  });
               });
            });
         });
      };
      document.body.appendChild(scriptElement);
      // ---- End of Cart Integrations ----
   })();
</script>
Sample code: Displayed Directly
Please remember to replace const SHOW_ID = "YOUR_SHOW_ID" with your show ID
<div id="YOUR_ELEMENT_ID" style="height: 960px; width: 540px;"></div>
<script>
   (function () {
      const ELEMENT_ID = "YOUR_ELEMENT_ID";
      const SHOW_ID = "YOUR_SHOW_ID";
      // Reduces server calls if a product has a crazy number of images.
      const MAX_IMAGES_COUNT = 6;
      // Extracts product handle from the product URL
      const SHOPIFY_PRODUCT_URL_HANDLE_REGEX = /\/products\/(.[\w\d-+]+)/;

      // Sometimes image URLs miss the protocol at the beginning
      // E.g. '//cdn.shopify.com/s/files/.../image.jpg'
      const urlSanitizer = (url) => {
         if (typeof url === "string") {
            if (url.startsWith("//")) return `https:${url}`;
            else if (url.toLocaleLowerCase().startsWith("http")) return url;
            else console.log(`Not a valid URL: ${url}`);
         } else console.log(`Not a valid URL: ${url}`);
         return null;
      };

      //========== Shopify Ajax API Helper methods ===============

      const storeApi = {};

      storeApi.getProductByUrl = (url) => {
         const handle = SHOPIFY_PRODUCT_URL_HANDLE_REGEX.exec(url);
         if (typeof handle[1] !== "string" && handle[1].length > 0) {
            console.error("The provided URL is hhgfhghs");
            return;
         }
         return fetch("/products/" + handle[1] + ".js", {
            method: "GET",
            headers: {
               "Content-Type": "application/json",
            },
         }).then((resp) => resp.json());
      };

      storeApi.addToCart = (itemId) =>
         fetch("/cart/add.js", {
            method: "POST",
            headers: {
               "Content-Type": "application/json",
            },
            body: JSON.stringify({
               items: [
                  {
                     quantity: 1,
                     id: itemId,
                  },
               ],
            }),
         }).then((resp) => resp.json());

      storeApi.updateItemInCart = (itemId, quantity) =>
         fetch("/cart/update.js", {
            method: "POST",
            headers: {
               "Content-Type": "application/json",
            },
            body: JSON.stringify({
               updates: {
                  [itemId]: quantity,
               },
            }),
         }).then((resp) => resp.json());

      storeApi.getCartState = () =>
         fetch("/cart.js", {
            method: "GET",
            headers: {
               "Content-Type": "application/json",
            },
         }).then((resp) => resp.json());

      const scriptElement = document.createElement("script");
      scriptElement.src = "https://lora-sdk.belive.sg/player-widget/latest/player.min.js";
      scriptElement.onload = function () {
         const player = window.BeLivePlayerWidget.initialize({
            showId: SHOW_ID,
            container: document.getElementById(ELEMENT_ID),
            buttons: {
               dismiss: window.BeLivePlayerWidget.Button.CLOSE,
               checkout: window.BeLivePlayerWidget.Button.LINK,
            },
         });
         const EVENT = window.BeLivePlayerWidget.PlayerEventType;

         player.on(EVENT.ADD_TO_CART, (addedItem, callback) => {
            storeApi
               .addToCart(addedItem.sku)
               .then((res) => {
                  if (res.items) {
                     callback(true);
                     console.log("Item added succussfully!");
                  } else if (res.description && res.description.includes("sold out")) {
                     callback({ success: false, reason: "out-of-stock" });
                  } else callback(false);
               })
               .catch((error) => {
                  callback(false);
                  console.error("Add to cart error! ", error);
               });
         });

         player.on(EVENT.UPDATE_ITEM_IN_CART, (updatedItem, callback) => {
            console.log(`Cart updated! ${updatedItem.previousQuantity} --> ${updatedItem.quantity}`);
            storeApi
               .updateItemInCart(updatedItem.sku, updatedItem.quantity)
               .then((res) => {
                  if (res.items) {
                     callback(true);
                     console.log("Item updated succussfully!");
                  } else callback(false);
               })
               .catch((error) => {
                  callback(false);
                  console.error("Error on updating item! ", error);
               });
         });

         player.on(EVENT.SYNC_CART_STATE, () => {
            // Use your method to check if the user has checkout
            storeApi.getCartState().then((res) => {
               if (res.item_count == 0) {
                  // Emptying the in-player cart
                  player.updateCart([]);
               } else {
                  player.updateCart(
                     res.items.map((item) => ({
                        sku: item.id,
                        quantity: item.quantity,
                        imageUrl: item.image,
                        name: item.product_title,
                        description: item.product_description,
                        currentPrice: item.discounted_price / 100,
                        colorName: item.variant_title,
                     })),
                  );
               }
            });
         });

         player.on(EVENT.CHECKOUT, () => {
            // Use the showCheckout() method to safely
            // navigate the user to your checkout page
            player.showCheckout(window.location.origin + "/cart");
         });
         // ---- End of Cart Integrations ----

         // ---- Start of Product Hydration ----
         player.on(EVENT.SYNC_PRODUCT_DATA, (products) => {
            // Iterates over all the products you have added to the show on the dashboard
            products.forEach(({ ref: sku, id, url }) => {
               // Your method to fetch a product data
               storeApi.getProductByUrl(url).then((item) => {
                  player.updateProduct(id, {
                     name: item.title,
                     brand: item.vendor,
                     description: item.description,
                     sku: item.id,
                     defaultVariantIndex: 0,
                     colors: item.variants.map((variation) => ({
                        colorName: variation.title,
                        sku: item.id,
                        images: [
                           // Adding the featured image of the chosen variation (if existed) at the beginning of the images array
                           ...(variation.featured_image ? [variation.featured_image.src] : []),
                           // Adding product imgaes
                           ...item.images
                              .slice(0, MAX_IMAGES_COUNT - 1)
                              .map((url) => urlSanitizer(url))
                              .filter((url) => typeof url === "string"),
                        ],
                        sizes: [
                           {
                              name: variation.title,
                              sku: variation.id,
                              currentPrice: variation.price / 100,
                              originalPrice: variation.compare_at_price / 100,
                           },
                        ],
                     })),
                  });
               });
            });
         });
      };
      document.body.appendChild(scriptElement);
      // ---- End of Cart Integrations ----
   })();
</script>
For more detailed information about the Cart Integration feature and its implementation, read Cart Integration guide.
Adding integration code to your Shopify
There are different ways to add the integration code to the Shopify store. You need to make sure that your integration code is included in all pages that you have the player embedded on.
(Option 1) Add to the page content
Recommended if:
- You only have a single landing page for the incoming traffic to the live show
Steps:
Copy-paste the provided sample integration code to your page content (in HTML mode)
(Option 2) Add to all pages
Recommended if:
- You have the player embedded on multiple or all pages
Steps:
Add a button in Custom Liquid section in any pages that you want to display the LORA player
In your Shopify theme codes, create a snippet and add the sample integration code there
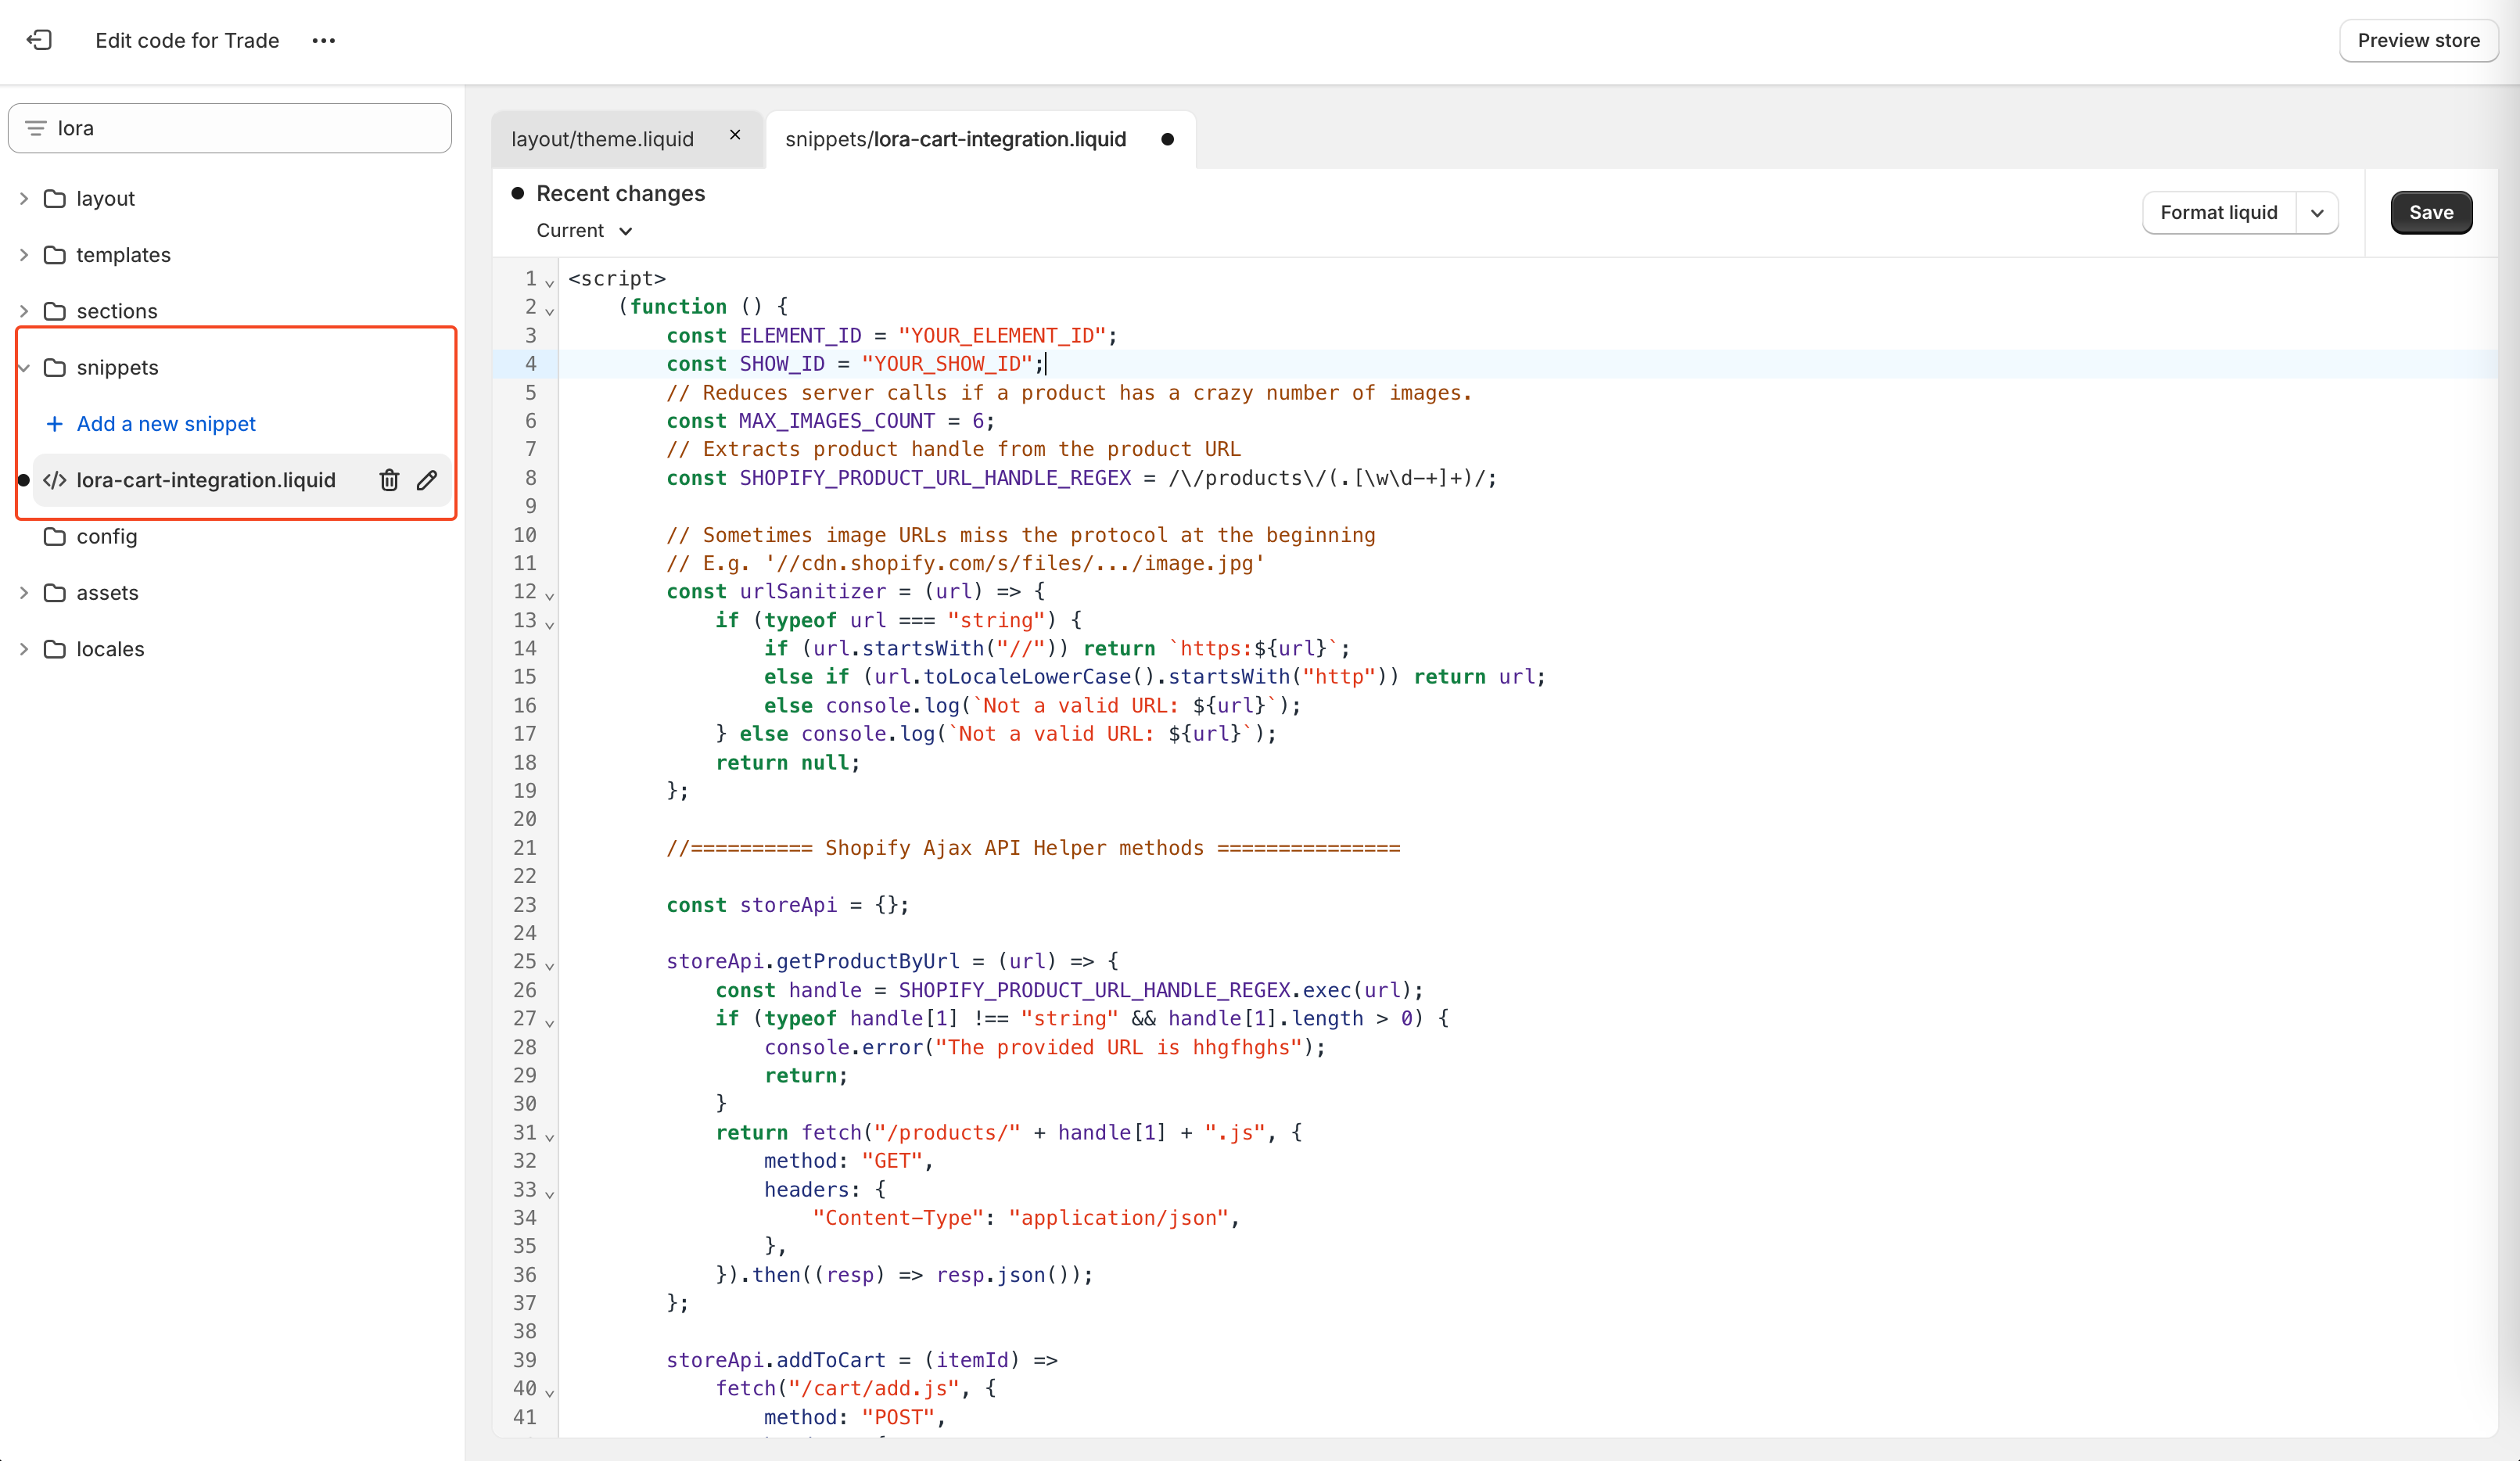
Assuming that you named the snippet
lora-cart-integration.liquid, add this snippet to thetheme.liquidlayout as below:theme.liquid{% render 'lora-cart-integration'%}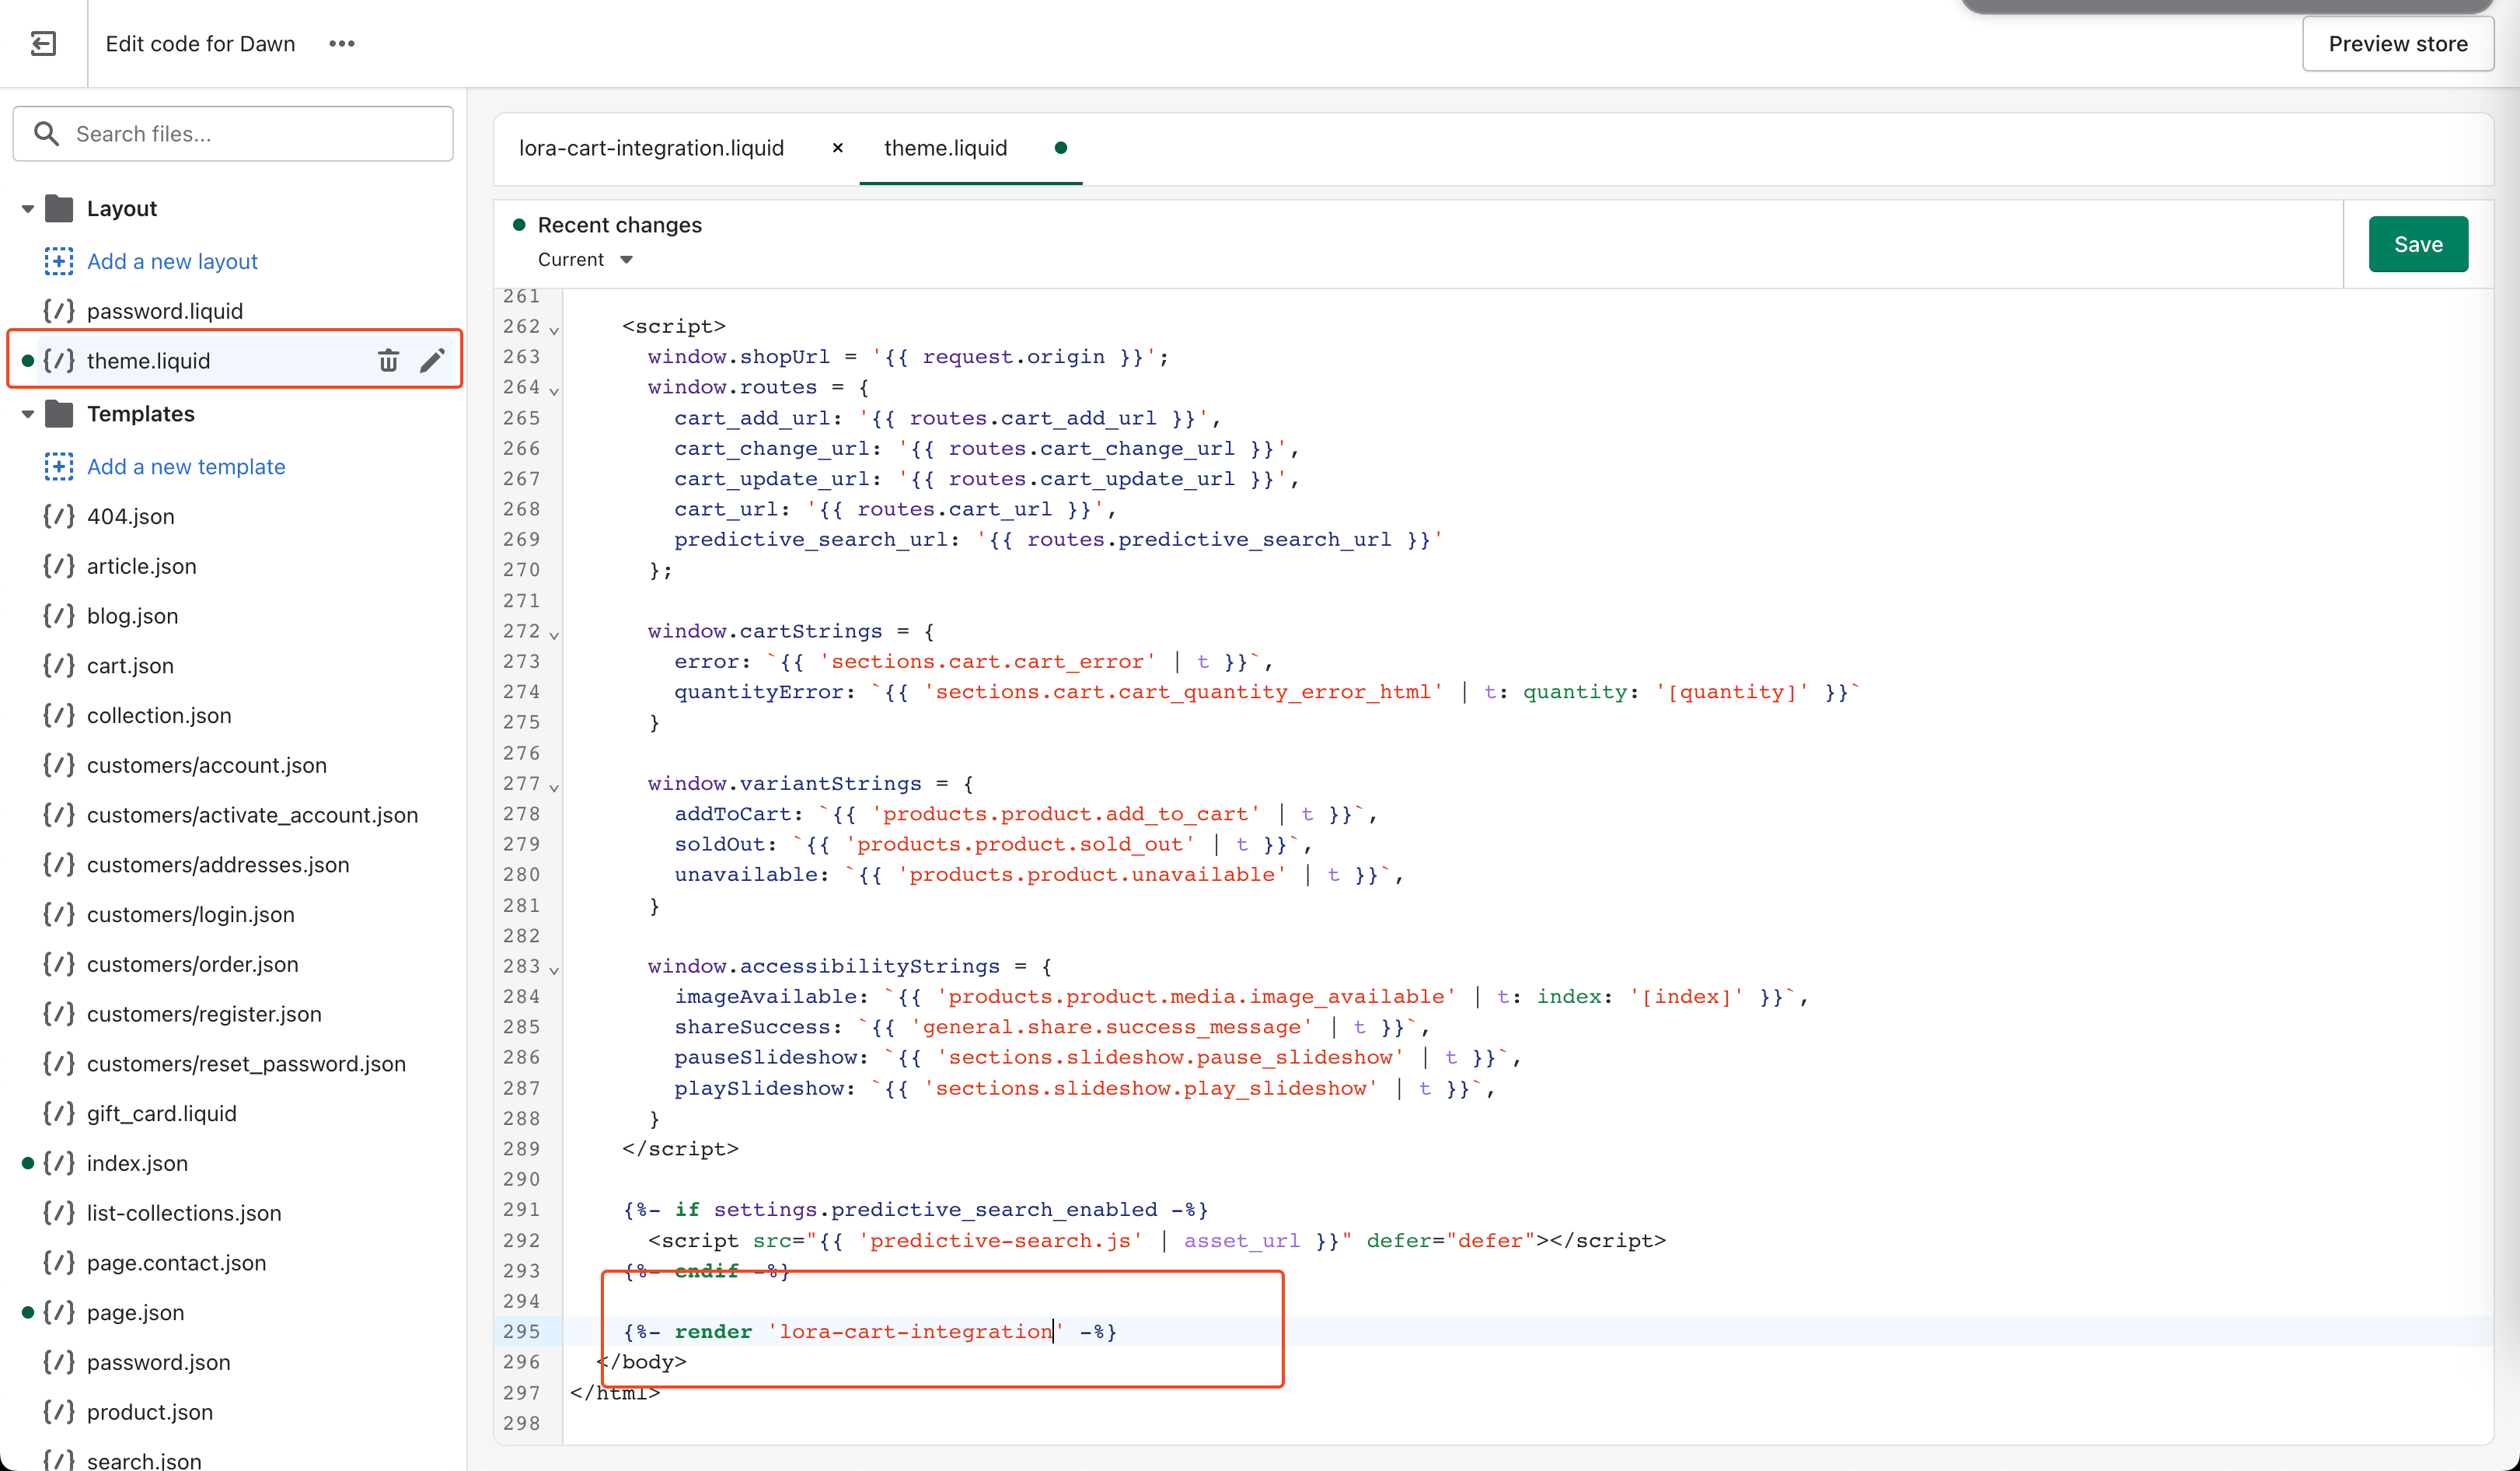
The result
Once you have the cart integration working, you should be seeing the following behaviour:
- The product prices are shown in the product list
- Clicking a product shows the product details view in the player
- You can add products to the cart
- You can manage the cart and go to check out