Tracking Shopify Cart Integration (Pro Only)
Integrate tracking with your Shopify store
Requirements
To utilize this integration for Live Show, you need to have Shopify integration and cart integration.
To begin, initialize the tracking script and create a method to retrieve products from your cart. Then, enrich the cart products with additional information for tracking purposes.
Tracking check out
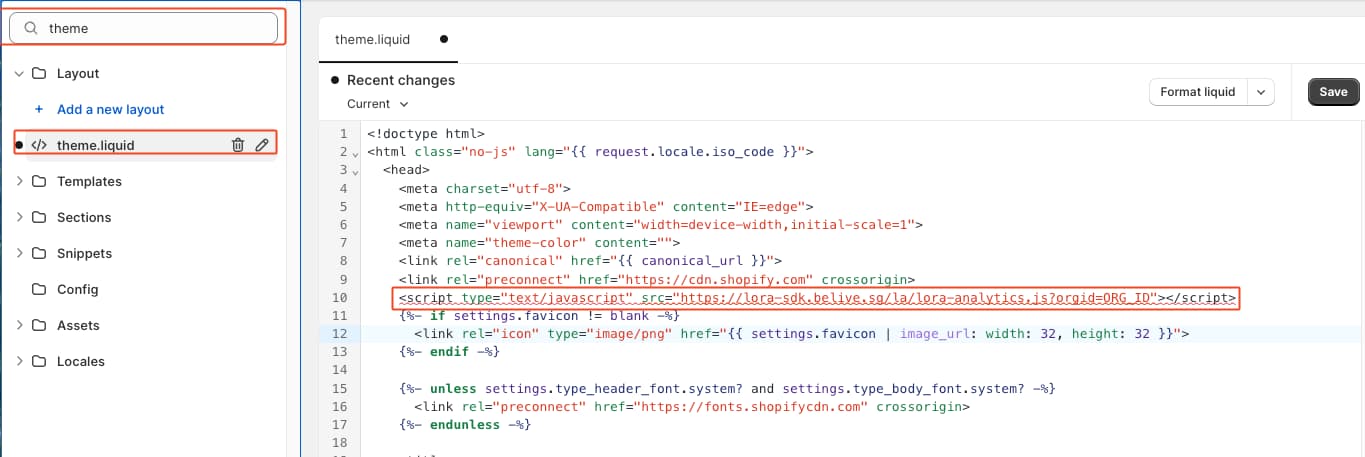
- Navigate to Online Store > Themes > Actions > Edit code.
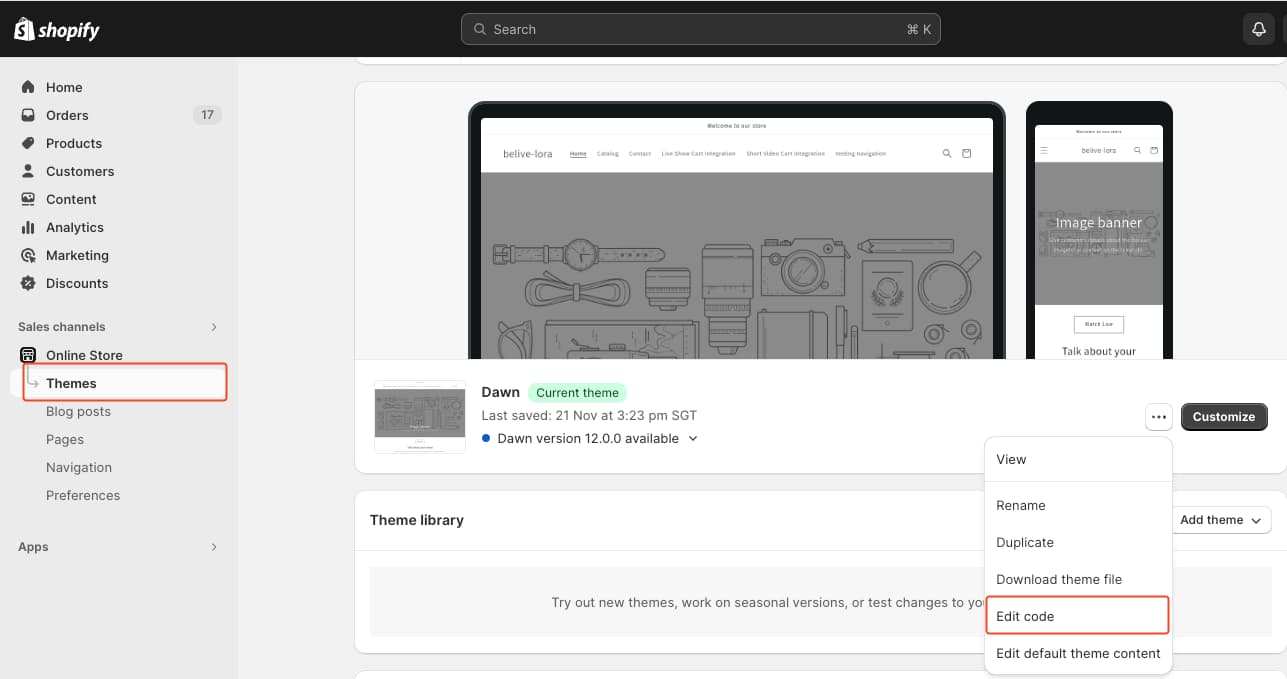
- Embed the tracking script within the
theme.liquidfile, positioned between the HTML<head>tags. Refer to the guide on embedding the LORA GTM script.
-
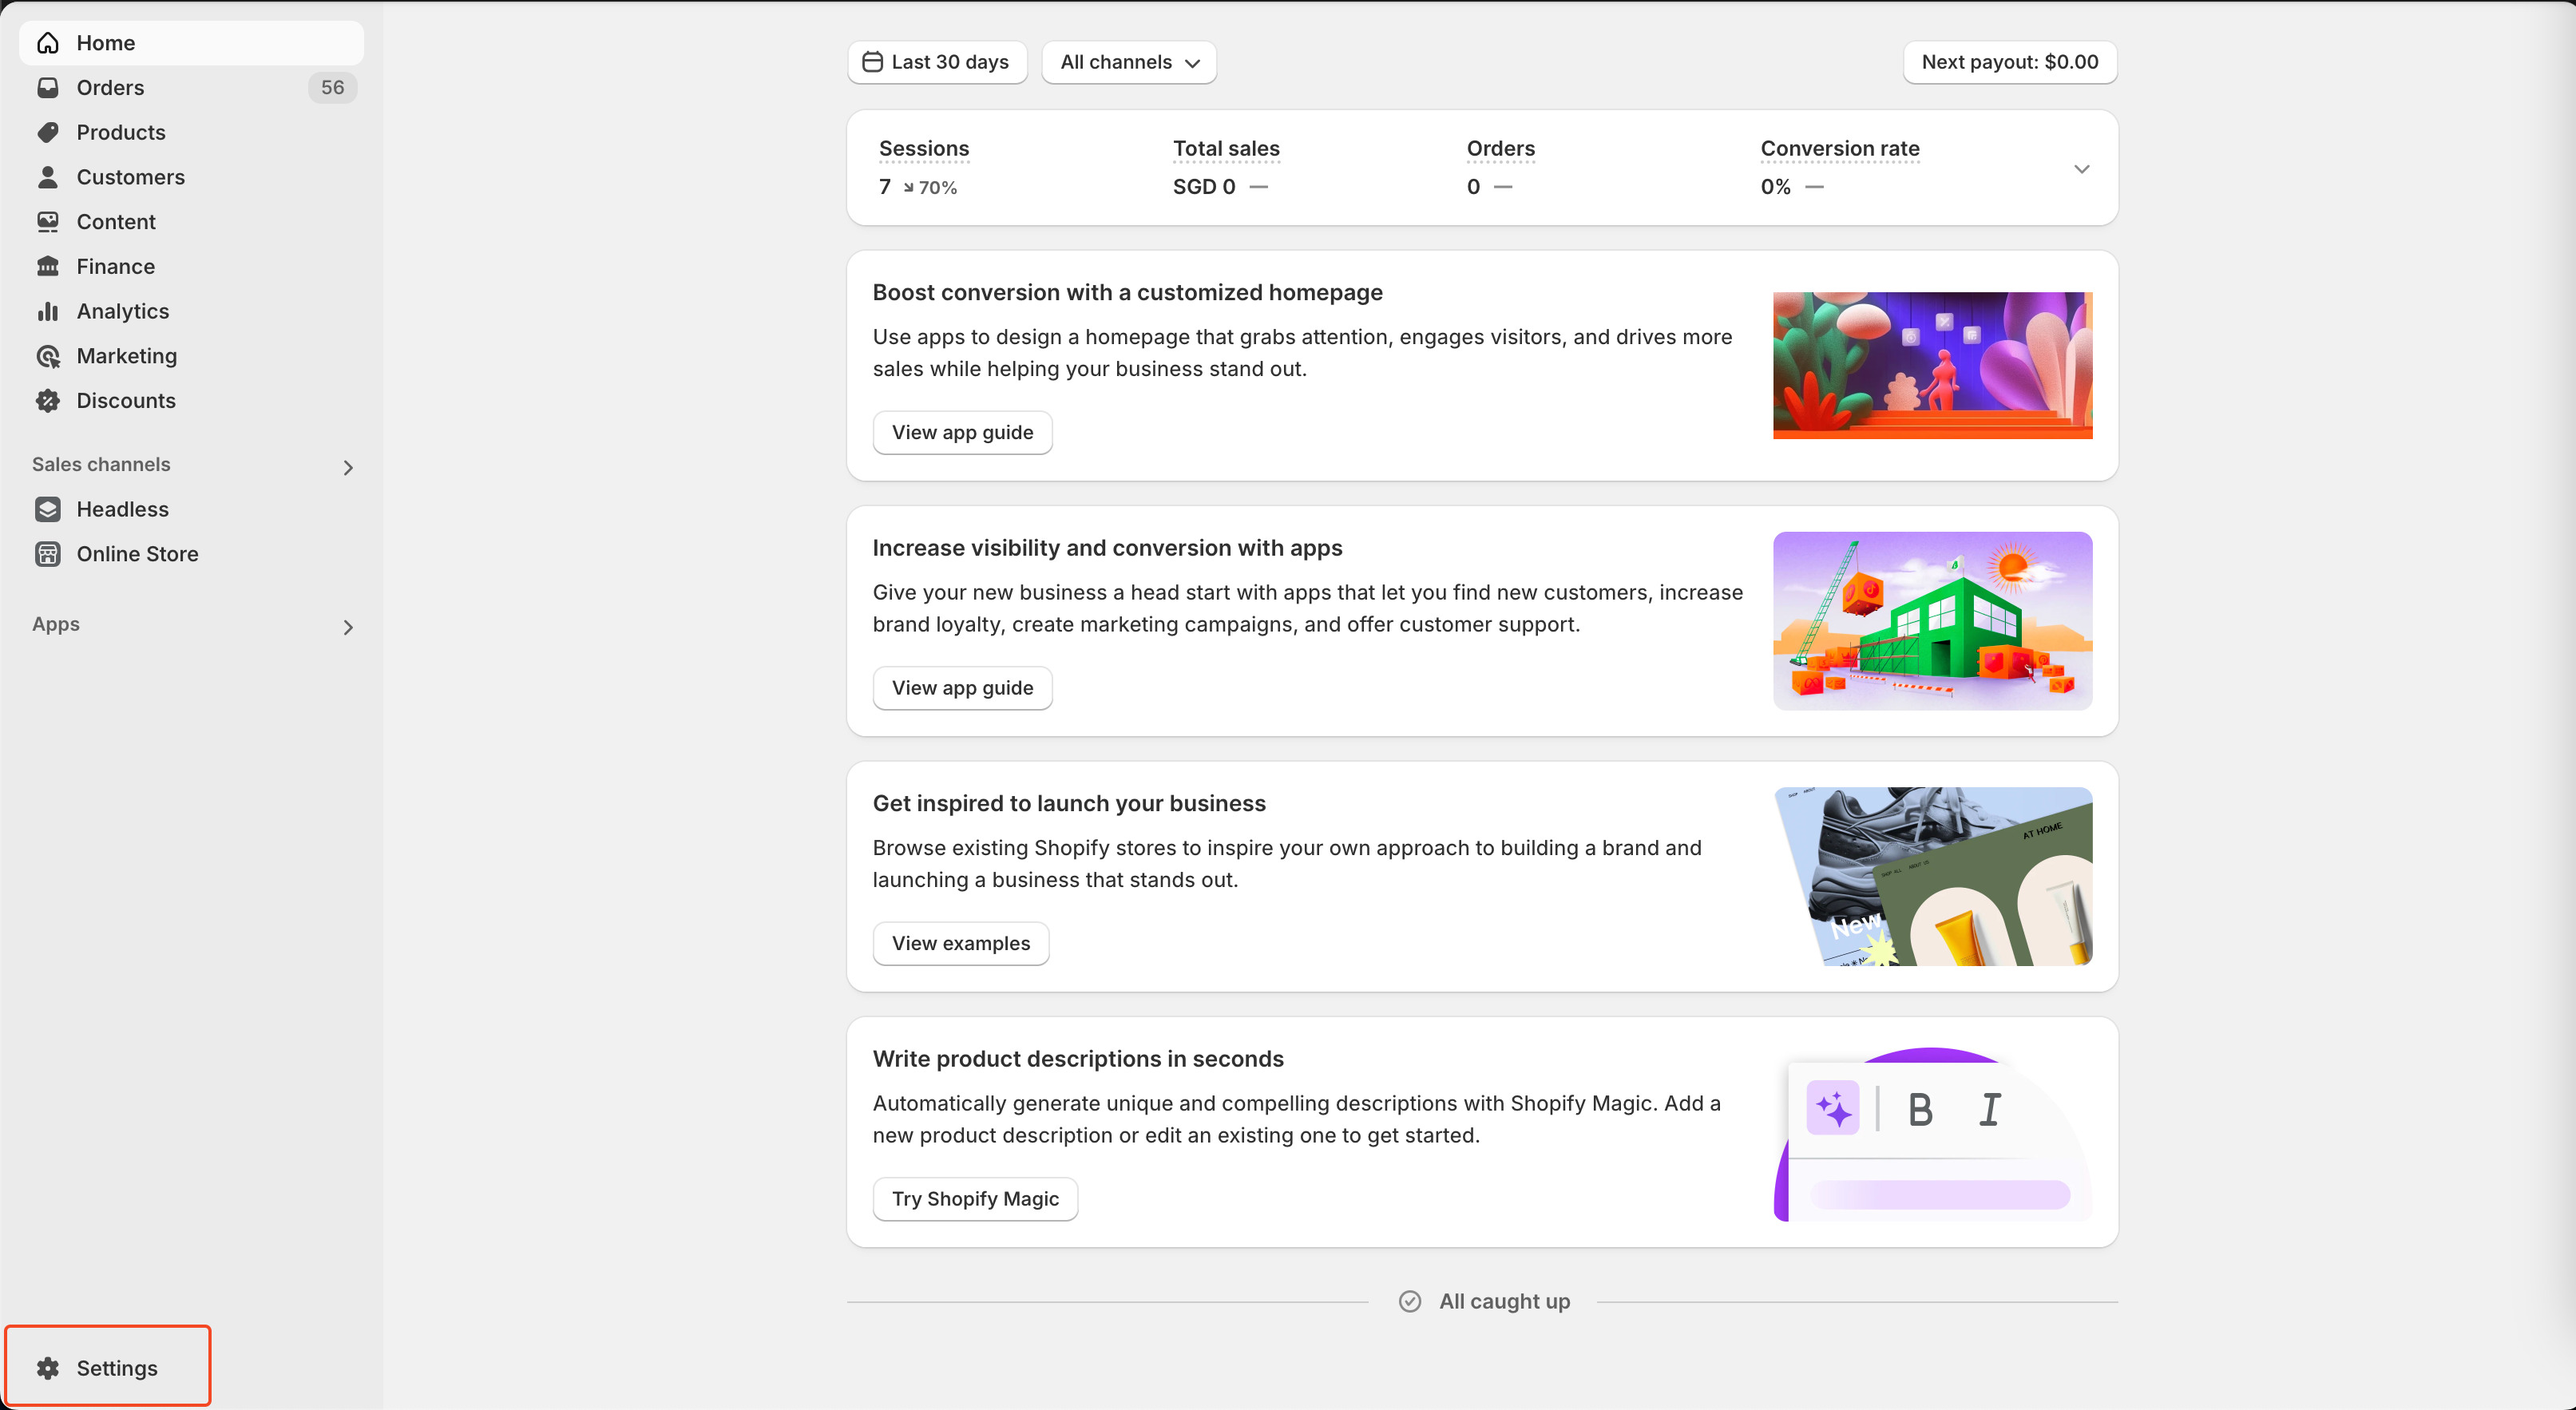
Implement Conversion Tracking in your Shopify store using a Shopify Custom Pixel.
- From the bottom-left select Settings
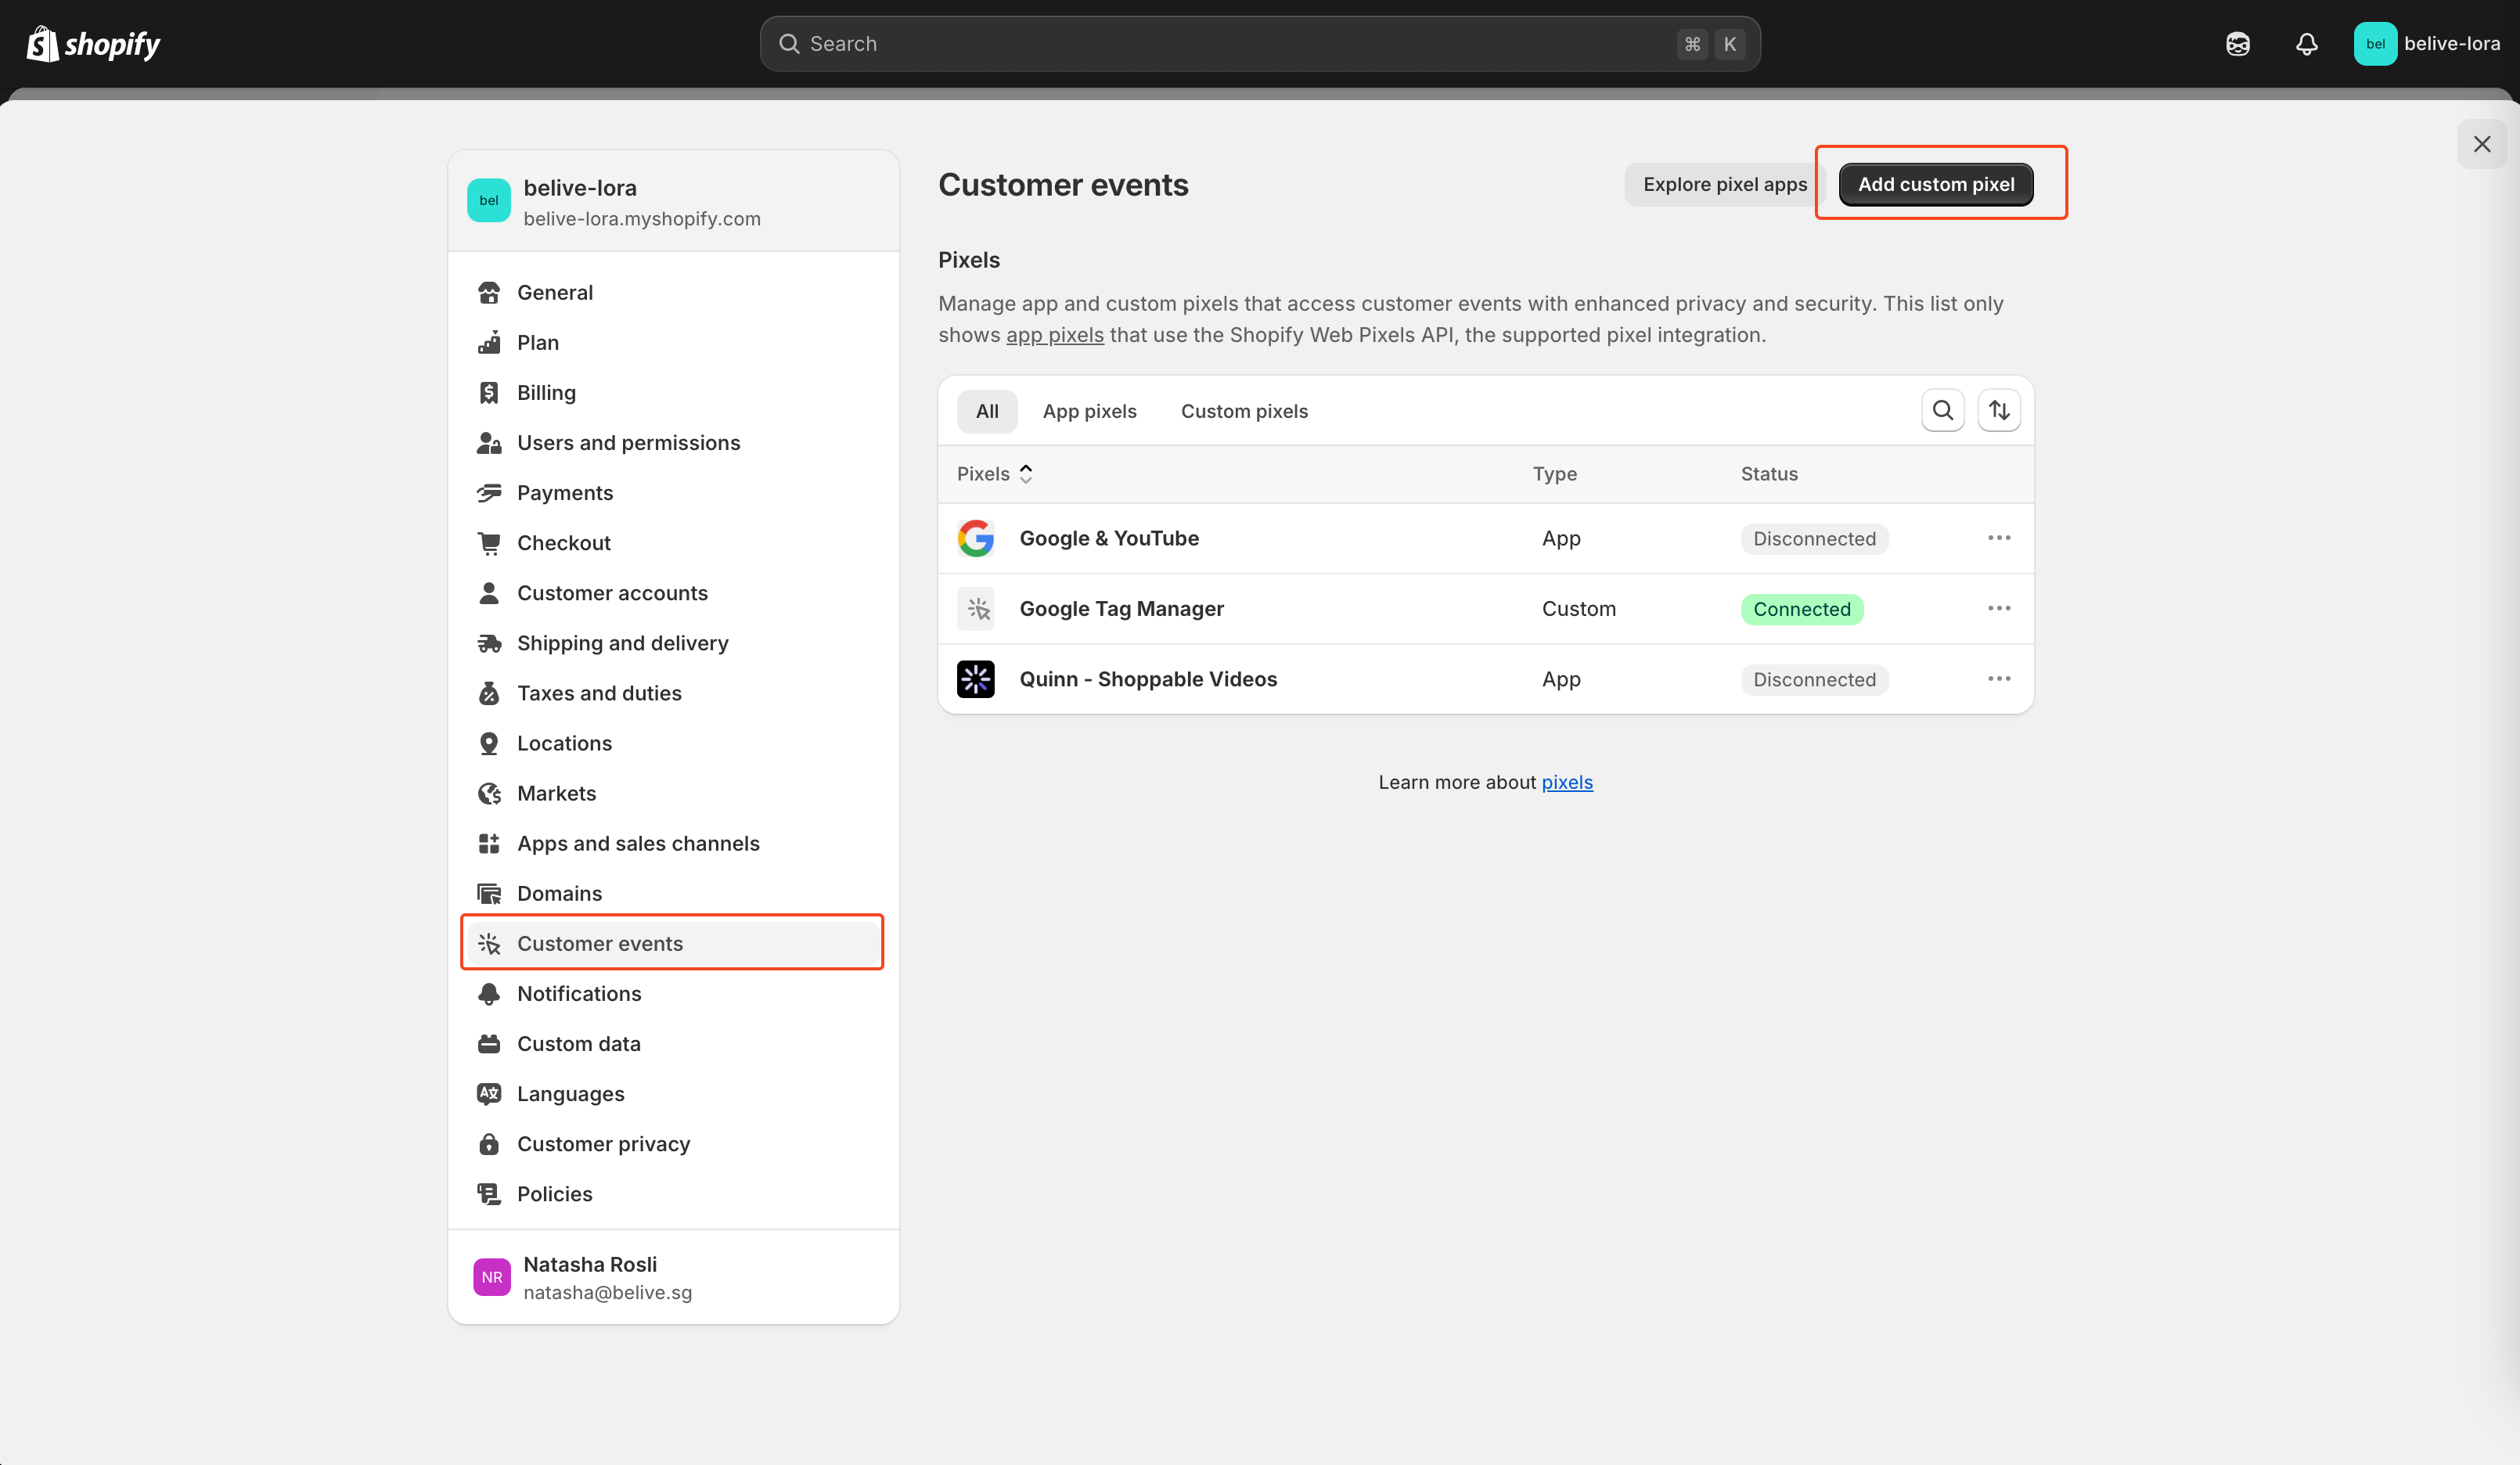
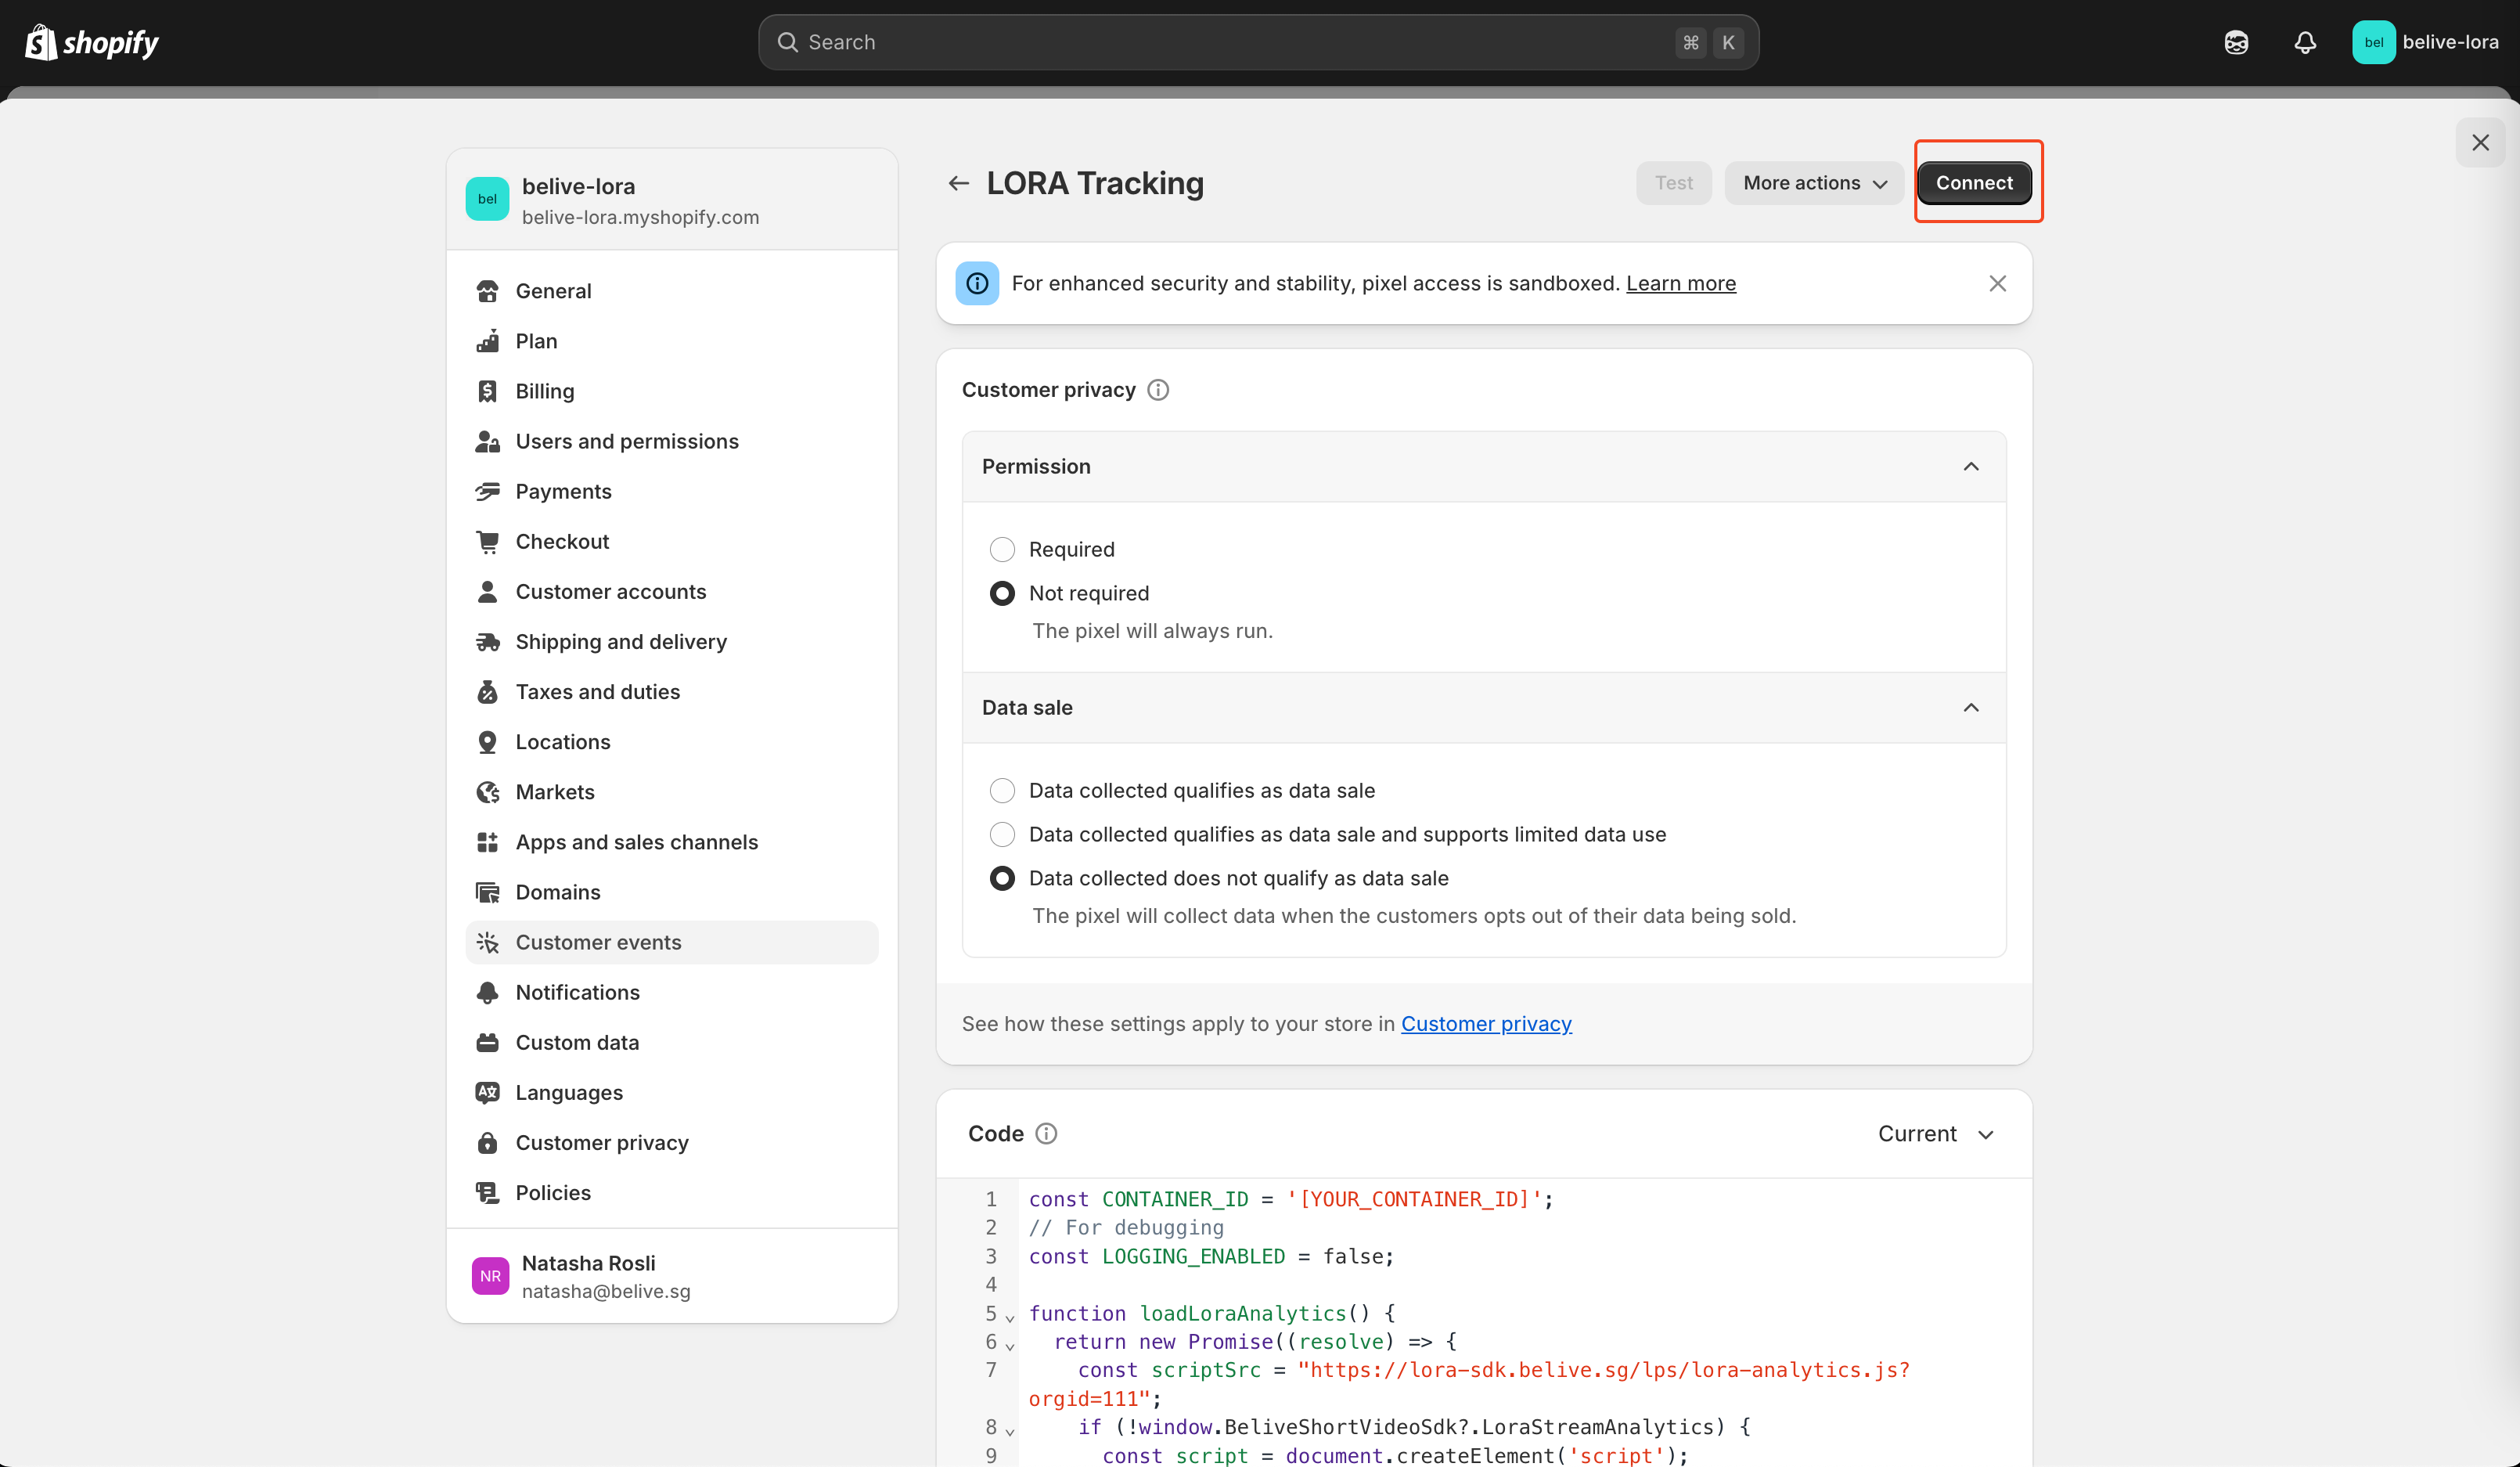
- Choose Customer events from the left menu. From the top-right, click on Add custom pixel.
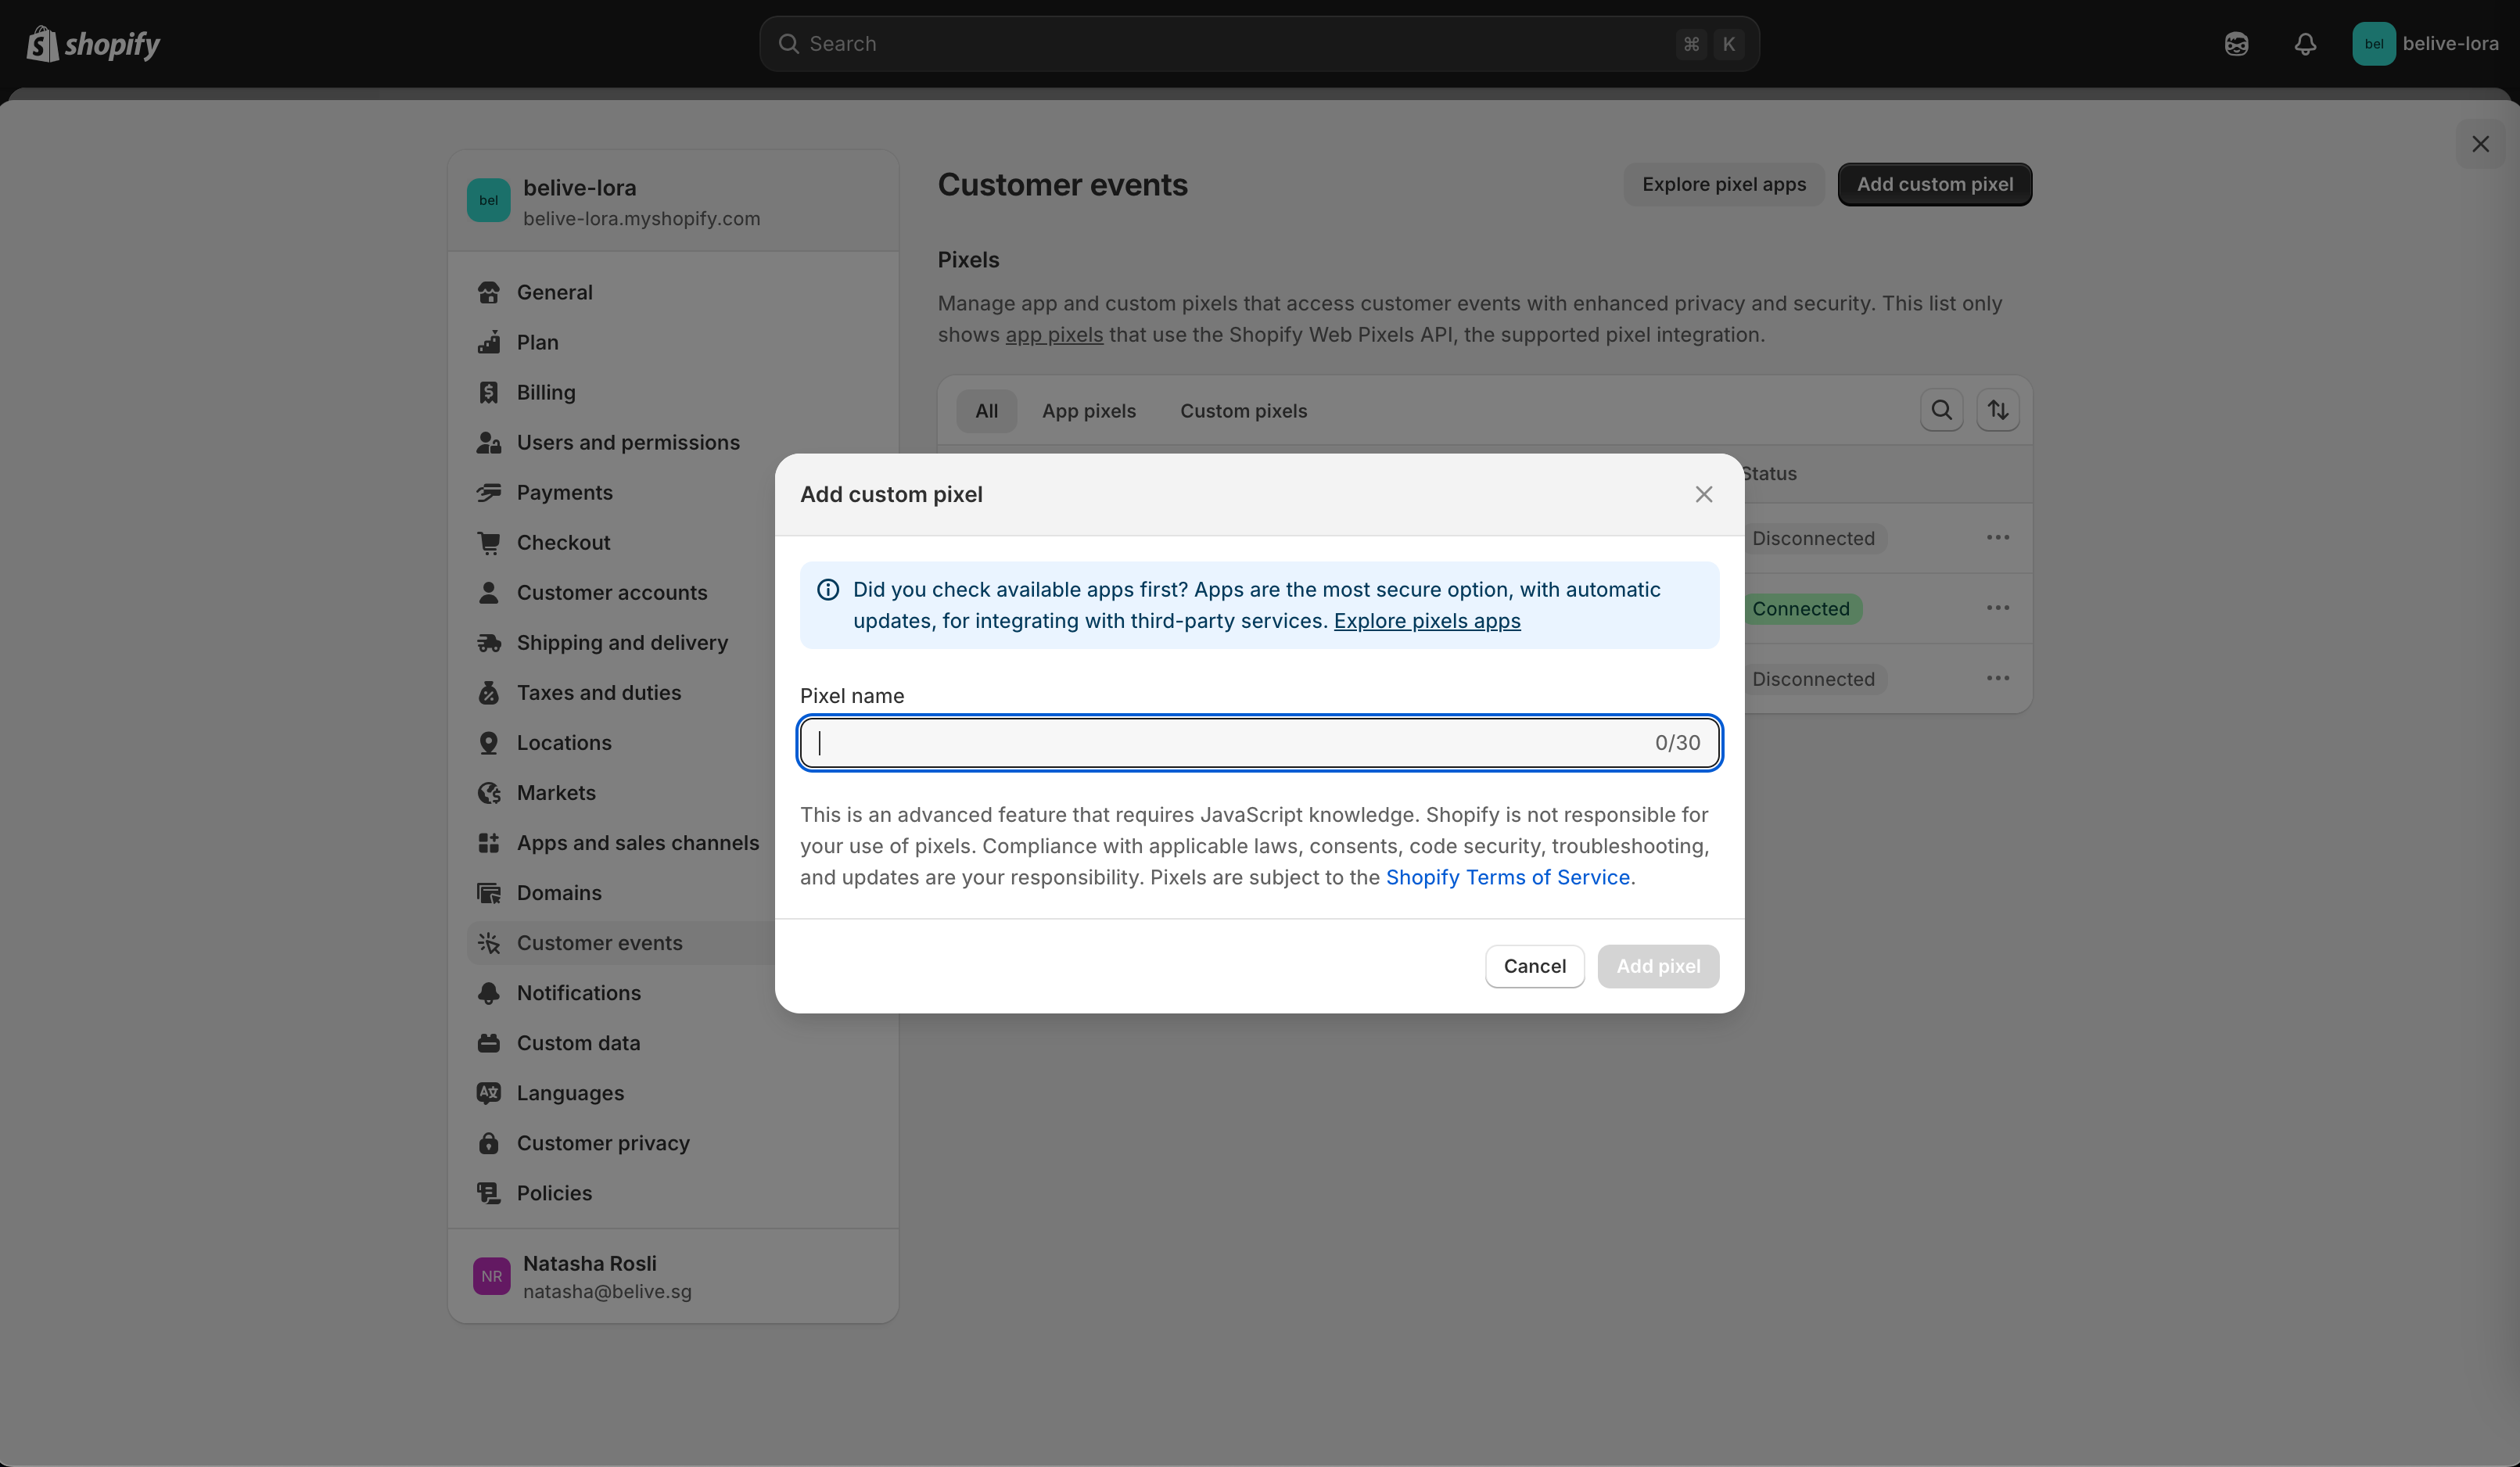
- Give it a name and click Add Pixel
- You should see a code box. If there are some codes already in the code box please remove them. Copy the code below, and paste it on the Custom Pixel code box.
Example code:
const CONTAINER_ID = "[YOUR_CONTAINER_ID]";
// For debugging
const LOGGING_ENABLED = false;

function loadLoraAnalytics() {
    return new Promise((resolve) => {
    const scriptSrc = "https://lora-sdk.belive.sg/la/lora-analytics.js?orgid=[ORG_ID]";
    if (!window.BeliveShortVideoSdk?.LoraStreamAnalytics) {
        const script = document.createElement("script");
        script.src = scriptSrc;
        script.onload = function () {
            window._loraAnalytics = new window.BeliveShortVideoSdk.LoraStreamAnalytics(CONTAINER_ID);
            resolve(window._loraAnalytics);
        };
        document.head.appendChild(script);
    } else if (!window._loraAnalytics) {
        window._loraAnalytics = new window.BeliveShortVideoSdk.LoraStreamAnalytics(CONTAINER_ID);
        resolve(window._loraAnalytics);
    } else {
        resolve(window._loraAnalytics);
    }
    });
}
function mapLineItemToAnalyticsItem(item) {
    return {
    item_id: item.variant.id.toString(),
    item_variant: item.variant.title,
    item_name: item.variant.product.title,
    price: item.variant.price.amount,
    quantity: item.quantity,
    };
}
analytics.subscribe("checkout_started", (event) => {
    LOGGING_ENABLED && console.log("received checkout_started\n", event);
    const currency = event.data?.checkout?.currencyCode;
    const total = event.data?.checkout?.totalPrice?.amount;
    const coupon = event.data?.checkout?.discountApplications?.join(",");
    const products = event.data?.checkout?.lineItems?.map(mapLineItemToAnalyticsItem);
    loadLoraAnalytics().then(() => {
    window._loraAnalytics.trackingCheckout(products, total, currency, coupon);
    });
});
analytics.subscribe("checkout_completed", (event) => {
    LOGGING_ENABLED && console.log("received checkout_completed\n", event);
    const currency = event.data?.checkout?.currencyCode;
    const total = event.data?.checkout?.totalPrice?.amount;
    const shipping = event.data?.checkout?.shippingLine?.price?.amount;
    const tax = event.data?.checkout?.totalTax?.amount;
    const transaction_id = event.data?.checkout?.order?.id;
    const coupon = event.data?.checkout?.discountApplications?.join(",");
    const products = event.data?.checkout?.lineItems?.map(mapLineItemToAnalyticsItem);
    loadLoraAnalytics().then(() => {
    window._loraAnalytics.trackingPurchaseSuccess(products, total, currency, transaction_id, coupon, shipping, tax);
    });
});- Press Save and then press Connect
- From the bottom-left select Settings
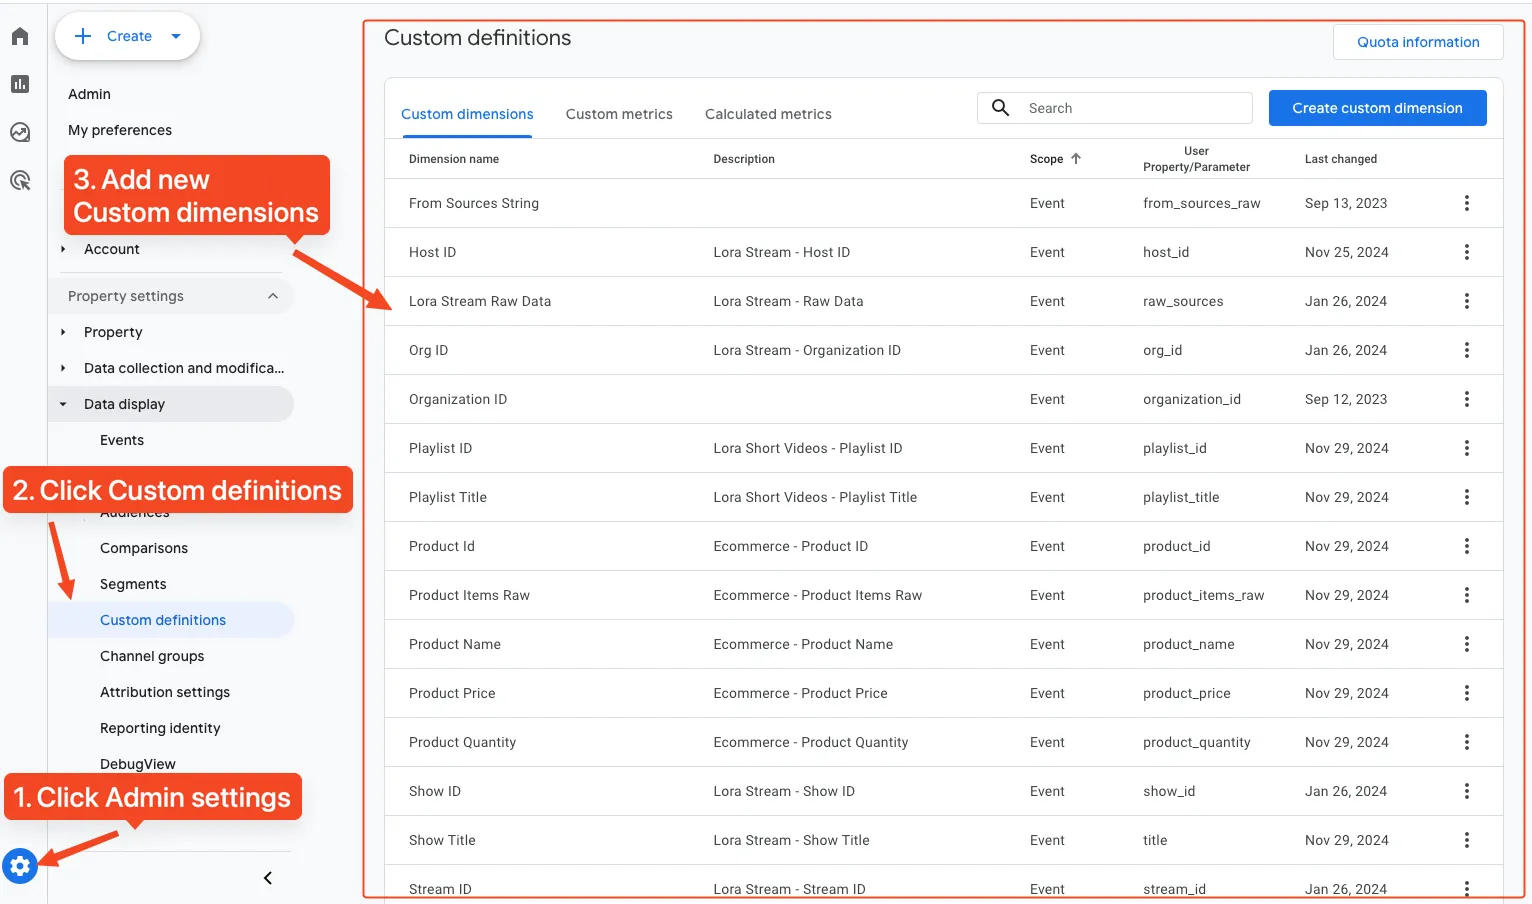
Add Custom Dimensions
- Login to your Google Analytics page
- From the bottom-left select Admin setting
- From the left menu select: Property settings > Data display > Custom definitions
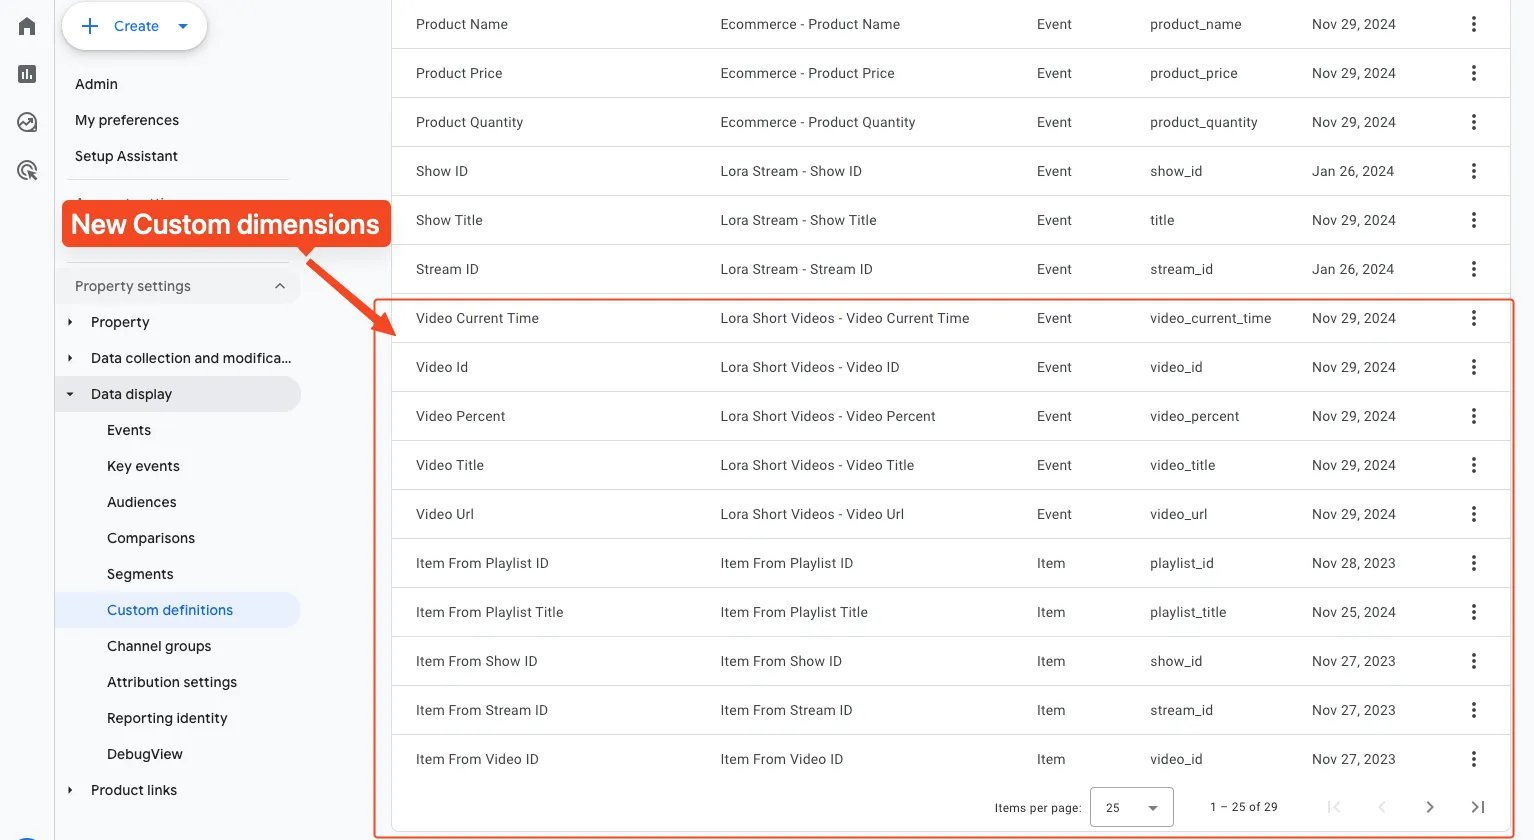
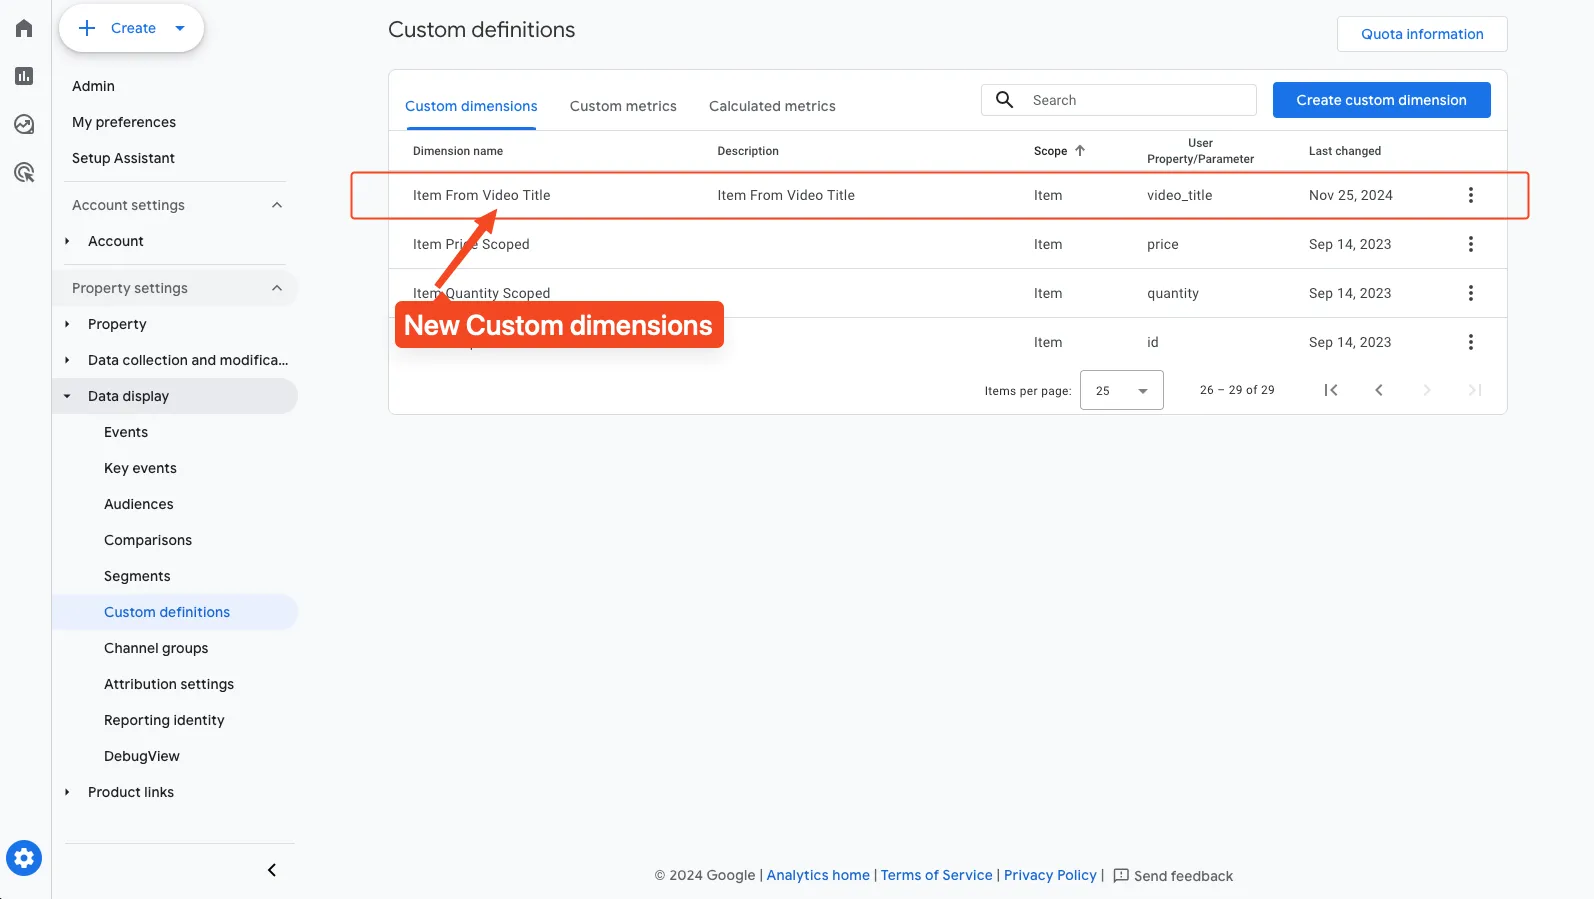
- Create following dimensions: